


In this tutorial, you will learn how to easily create a custom Divi contact form message pattern.
The Divi contact form is a great tool for allowing your visitors to easily submit messages and inquiries. But what if you want to customize the message that you receive when they successfully submit their inquiry? That’s where custom message patterns come in.
Table of contents
- What is the Divi contact form message pattern?
- How to set up a message pattern for the contact form
- Add more dynamic message pattern tags to the Divi contact form module
What is the Divi contact form message pattern?
Perhaps you do not know what the message pattern is. This is the message that you will receive after a form on your website is submitted. By default, this is a very basic message pattern but you can change this to make it more appealing.
How to set up a message pattern for the contact form
This is quite easy to do. Open your Divi contact form module and scroll down to the Email tab.
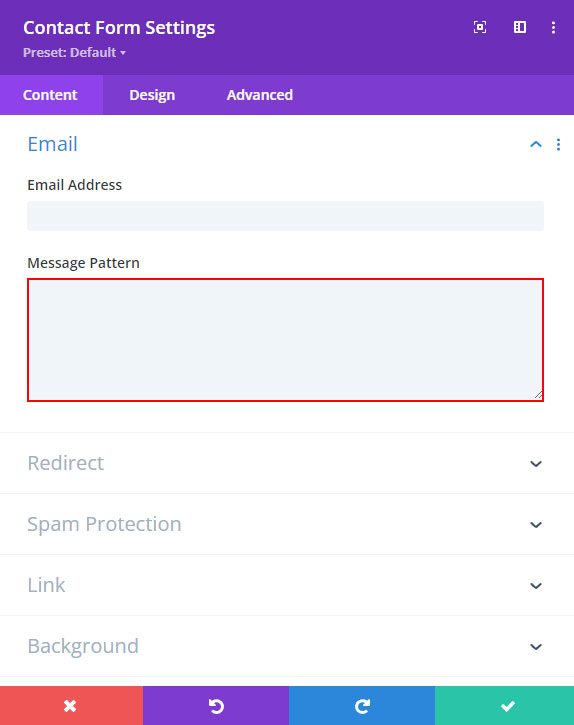
Under Message Pattern, you can place your message that will show in your email when a form is submitted.
Adding fields to your message pattern field is easy to do. Just be sure to include the %% symbol before and after the Field ID for successful integration.
I will give you an example of creating a custom message pattern for this form:
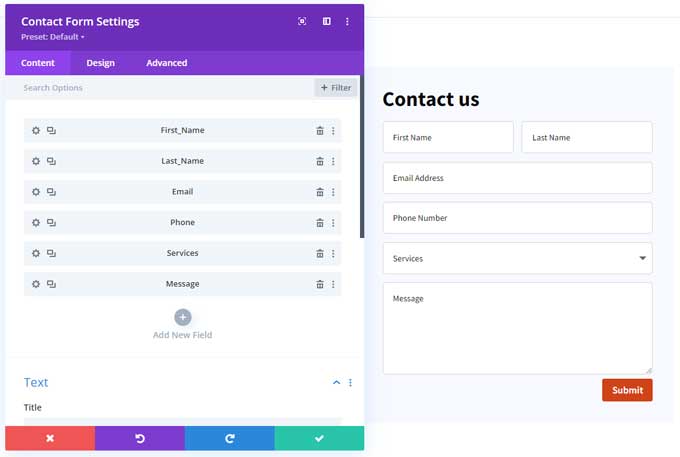
In the next few steps, I will show you how to create a custom message pattern. First, we need to get the field ID.
How to get the field ID
As I said before we need to wrap the field ID in %% symbols. To get a field ID just open a field by clicking on the gear icon.
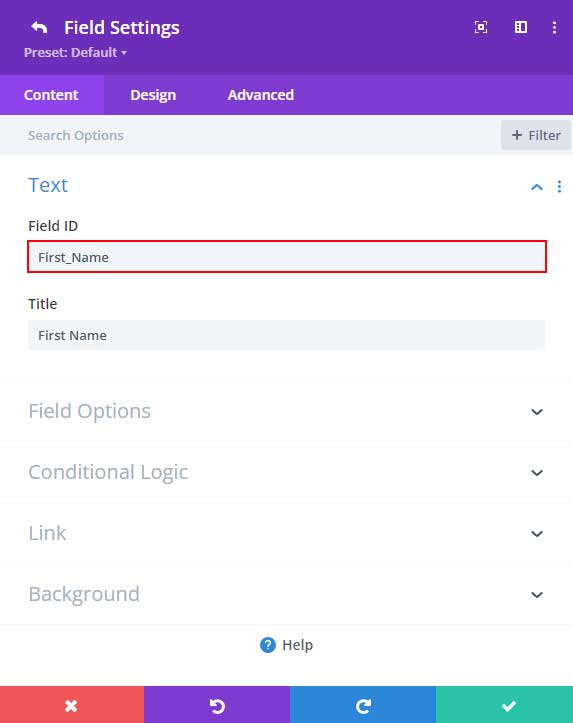
This is the field ID for my First name field. Copy this and go back to the message pattern field and paste it in with %% before and after. It should look like this:
%%First_Name%%
You can add text before %% to make it more descriptive.
Now do the same process for all the other fields.
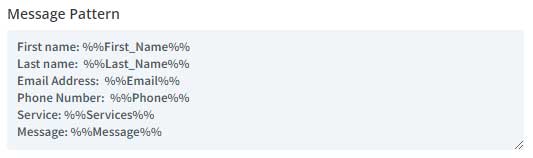
My message pattern will look like this:
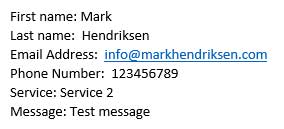
And when a form is submitted, this is what my email looks like.
Add more dynamic message pattern tags to the Divi contact form module
Adding more specific tags to your message pattern is easy with the Divi Contact Form Helper plugin. This plugin allows you to add dynamic tags for custom fields and offers great flexibility when creating a contact form message pattern.
This handy plugin comes with 22 extra merge tags such as Post/Page ID, Date, and Time to your message template. It’s great for adding more clarity or tracking essential data points – all with a few easy steps.
Conclusion
In conclusion, with this tutorial, you should have a good understanding of how to make a custom message pattern. With just these few steps, you can ensure that your messages are delivered as intended and laid out exactly how you want them to be.
If you face any issue’s let me know in the comments!

Thank you very much for this article! You made my day 🙂
You’re welcome!