


Are you looking for ways to easily add Divi contact forms to your website? If so, then you’re in the right place!
The Divi contact form module is a great way to quickly set up contact forms on any Divi website, without any coding required. In this post, we’ll look at what exactly you can do with a Divi Contact Form and why it’s useful, how to get started adding them to your site in just minutes, as well as some advanced tricks that pros use with their own contact forms.
By the end of this post, you’ll have all the tools necessary for crafting beautiful and functional contact forms that help met your customer’s needs.
So let’s dive in – it’s time to discover the power of Divi Contact Forms!
Table of contents
- How to create a Divi contact form
- How to style a form step-by-step
- Divi contact form premium plugins
- Examples of Divi contact form
- Alternatives for the Divi contact form
- Frequently asked questions
How to create a Divi contact form
Creating a contact form in Divi is easy and straightforward. To begin, open the Divi Builder and click on the “Add New Module” button (grey + icon). After selecting the Contact Form Module, you will be taken to its customization page where you can start customizing your form.

How to add additional fields to your contact form
You can add more fields to your contact form by clicking on the Add New Field + icon.
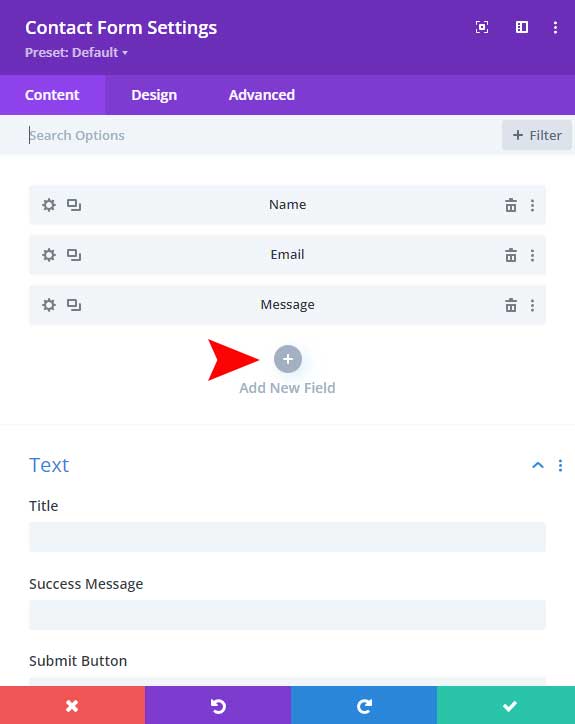
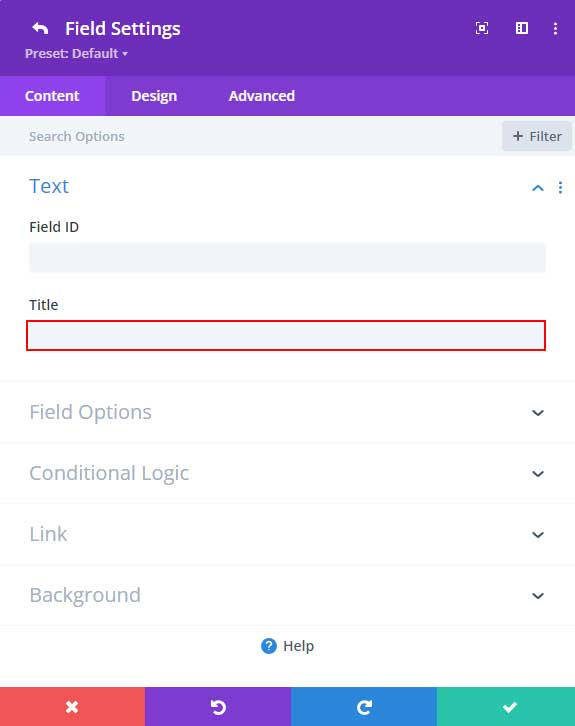
Once you’ve added a new field, the Field Settings tab will appear. If you’d like to customize any field further, just click on its gear icon!
Give your new field a suitable title that will serve as its label name. If you don’t input the Field ID, it will generate one automatically for you.
To modify the field type, open the Field Options tab and click on Type. This will bring up a drop-down menu with a variety of different field types to choose from, such as input fields, email fields, text areas, checkboxes, radio buttons, and drop-downs. Depending on your use case and what type of information you want to collect, you can customize the fields to your needs.
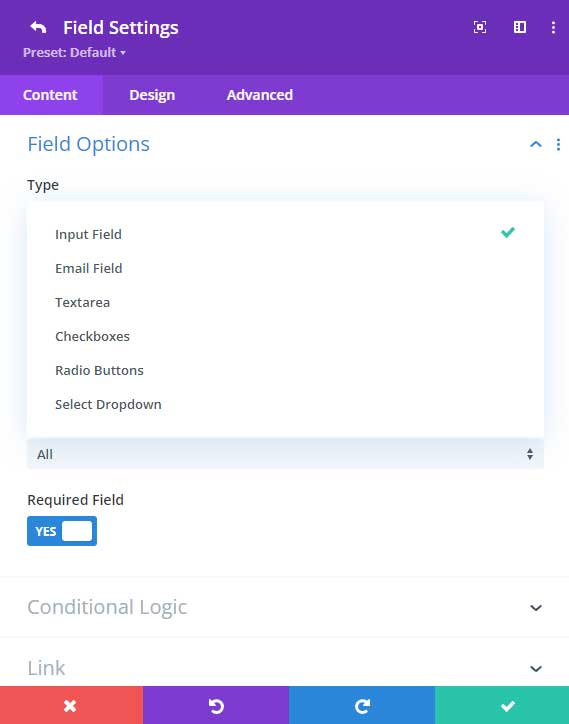
Here is an overview of each field type.
Input field
One of the most essential form fields you’ll use in your forms is the input field. They enable users to provide concise responses to queries. For instance, an input field might be “First Name”.
Email Field
The email field on your form is vital if you want to reach out to the user who submitted it. With this feature, you can effortlessly collect an email address and stay in contact with those who complete your forms.
Text Area
The text area field not only provides users with the ability to input text but also allows them to write considerably more than an ordinary input field. Using a text area for your website could be beneficial if you’re looking for customers to send detailed descriptions of projects they’d like done. This way all their information is conveniently found in one place!
Checkboxes
With checkboxes, your customers have the ability to pick several items from a list of options that you’ve presented.
Radio Buttons
Radio buttons give users a variety of choices to select from; however, unlike checkboxes which may permit multiple selections, radio buttons allow the user to engage in only one choice out of the options provided.
Select Dropdown
If you’re seeking to have website visitors pick a single item from multiple options, then the dropdown field is your tool of choice! Checkboxes, radio buttons, and similar features all enable users to opt for an answer out of several choices; however, which one will depend on what exactly you are asking and what response do you expect.
Once a Divi contact form module is configured and all fields are customized, you can save the settings and preview the contact form in real-time. This allows you to quickly see what your contact forms will look like before going live with them.
Create a custom success message
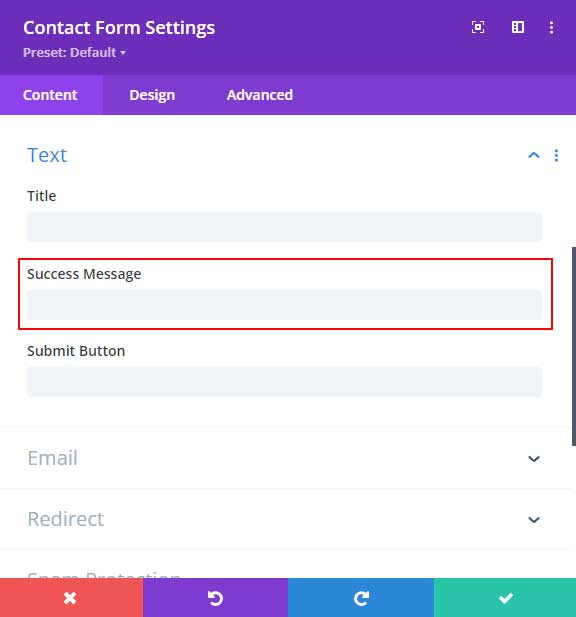
When customers submit a contact form, it’s important to provide them with an appropriate success message that confirms their submission was successful. This gives users peace of mind and reassures them that the information they submitted, is safely in your hands.
The success message should be brief but include all the necessary information customers should expect next, such as when and how you’ll respond, as well as how they can get in touch if needed. Overall, this provides great customer service and gives people assurance that you take their inquiries seriously.
You can place a custom message in the Success Message field, this will be shown after the form is submitted.
With this tutorial, you can further style the Divi contact form success message to make it more appealing.
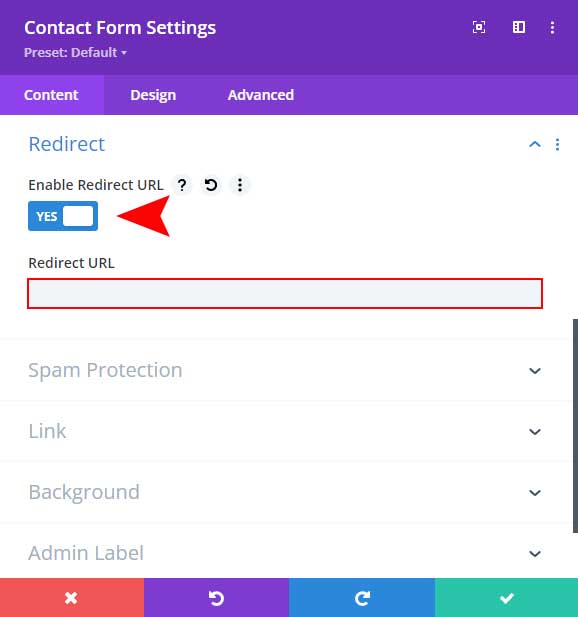
Create a redirect instead of a success message
Instead of displaying the success message on the same page as your form, you can send your visitors to a dedicated thank you page.
By enabling the redirect URL option and entering a designated address, customers can be seamlessly directed to an engaging thank you page. This offers them further insight into your services as well as what they should expect next in their journey with you!
Message pattern for email after submitting the form
When a customer submits a form, you will receive an email that a form is submitted with their information. With the message pattern, you can customize the outcome of that email.
I recommend following this tutorial on how to create a custom Divi contact form message pattern step-by-step.
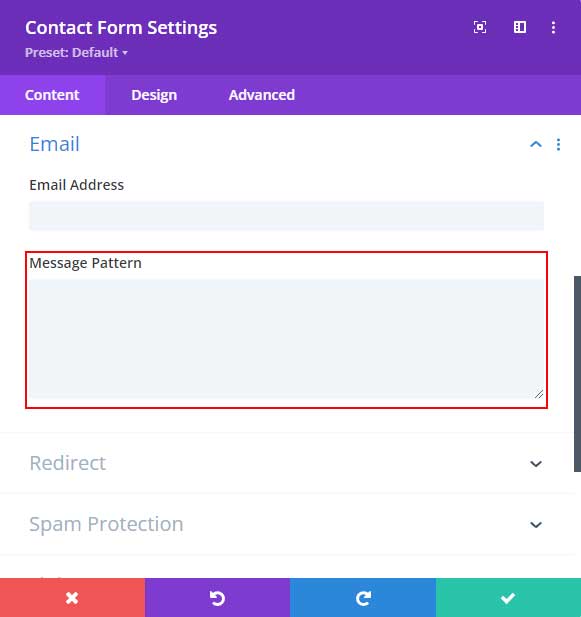
Hover over the Message Pattern title and click on the question mark for an example.
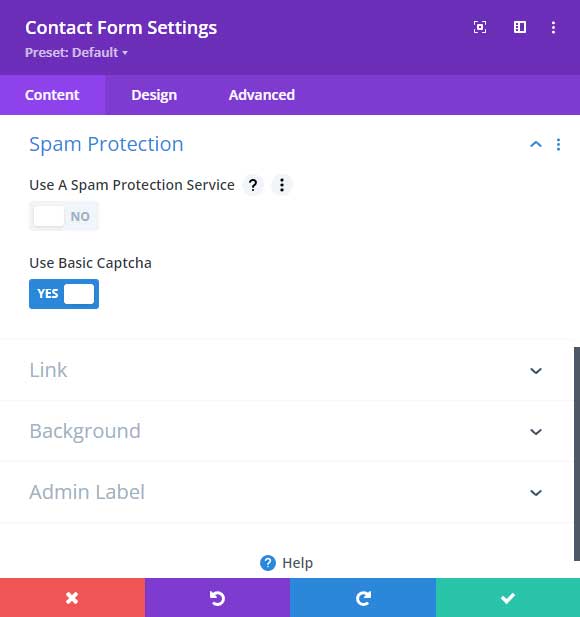
Spam protection for you Divi form
Divi is committed to keeping your contact forms free from spam. Choose the Basic Captcha for a simple math-based solution, or take it up a notch and enable Google ReCaptcha – an extra layer of protection that makes sure only legitimate visitors gain access.
I have a step-by-step tutorial on how to set up a Divi ReCAPTCHA.
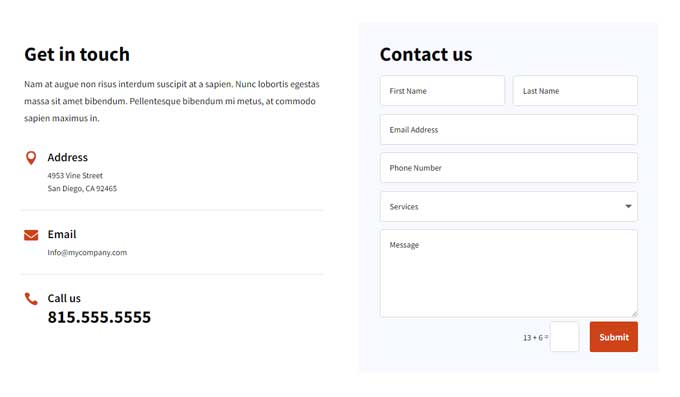
How to style a form step-by-step
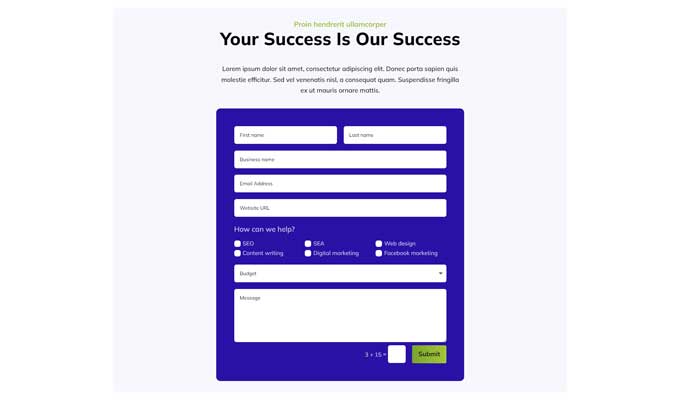
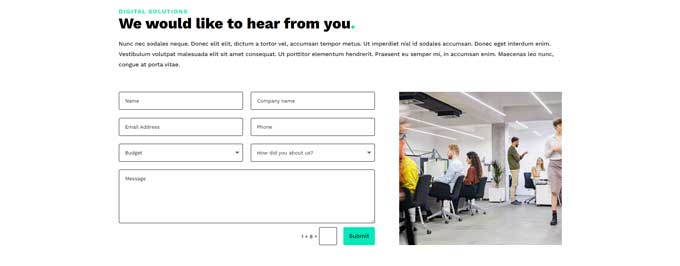
Now you know how to add a form in the Divi Builder it is time to style it. This will be the end result of our form.
Step 1: section and row
Add a section to your contact page with a row and choose a 1/2 – 1/2 column structure.
Open the row and then the second column and use the following settings in the design tab:
Background
Background Color: #f7f9ff
Switch over to the design tab:
Spacing
Padding: All sides 35px
Step 2: populating the left column
Add a text module in the left column and place the text “Get in touch” in the text editor and make it h2
Go to the design tab and use the following settings:
Heading text
Heading 2 Font: Source Sans Pro
Heading 2 Font Weight: bold
Heading 2 Font Size: 34px
Spacing
Margin-bottom: 10px
Add another text module and place some text in it (in my demo that is some lorem ipsum text) and then use the following settings in the design tab.
Text
Text Font: Source Sans Pro
Text Text Size: 16px
Text Line Height: 1.8em
Spacing
Padding-bottom: 13px
Now add a blurb module and use the following settings starting in the content tab.
Text
Title: Place your title here
Body: Place your text here
Image & Icon
Use Icon: Enable this
Icon: Choose an icon
Now hop over to the design tab and use the following settings:
Image & Icon
Icon Color: I have used the color #ce4318
Image/Icon Width: 24px
Image/Icon Margin: left margin 7px
Title Text
Title Font: Source Sans Pro
Title Text Size: 20px
Body Text
Body Line Height: 1.6em
Spacing
Margin-left: -7px
Padding-bottom: 25px
Border
Border Styles: Choose border-bottom
Bottom Border Width: 1px
Bottom Border Color: #e2e2e2
Duplicate this blurb module two times and remove the bottom border of the last one.
Step 3: populating the right column
Add a text module in the right column and place the text “Contact us” in the text editor and make it h2
Go to the design tab and use the following settings:
Heading text
Heading 2 Font: Source Sans Pro
Heading 2 Font Weight: bold
Heading 2 Font Size: 34px
Spacing
Margin-bottom: 10px
Now add the contact form module to the right column.
This is what my fields setup looks like:
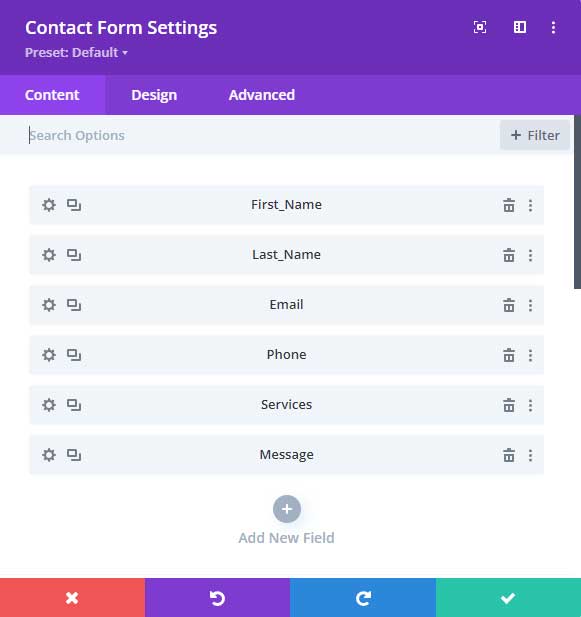
First and last name fields
For the first and last name fields disable the fullwidth option by opening those fields and going to the design tab, under layout disable Make Fullwidth.
Email field
Make sure that the type is set as Email Field, you can do that by opening this field and under Field Options setting the Type to Email Field.
Services
This field type is set as Select Dropdown. When you have set that you have options to add your services.

That’s it for our fields set up.
I have enabled Basic Captcha under Spam Protection and this will display captcha on our form.
Now we go to the design tab.
Fields
Fields Background Color: #ffffff
Fields Text Color: #000000
Fields Focus Text Color: #000000
Button
Use Custom Styles For Button: Yes
Button Text Size: 16px
Button Text Color: #ffffff
Button Background Color: #ce4318
Button Border Width: 0px
Show Button Icon: No
Border
Inputs Rounded Corners: 5px
Inputs Border Width: 1px
Inputs Border Color: #d6d6d6
And that’s it you should have the same contact form as in the demo.
Divi contact form premium plugins
Divi contact form plugins are a great way to enhance the functionality and usability of Divi contact forms. With these plugins, users can create custom forms with more options and features than what is available out of the box.
Divi Contact Form Helper
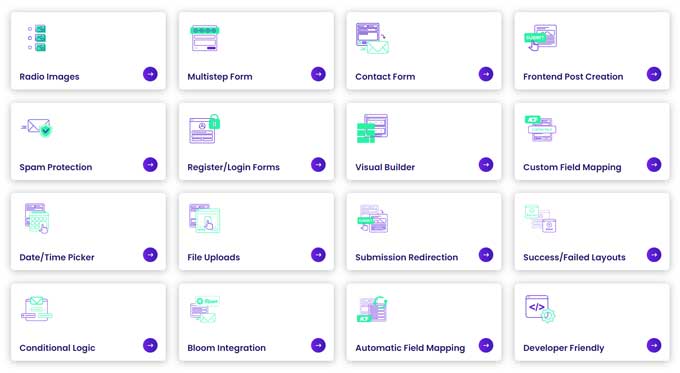
If you’re looking to level up your website’s contact form with some serious potential, then the Divi Contact Form Helper plugin is for you! Enjoy a plethora of exceptional features like file uploads, date & time pickers,s and custom subject lines. You also get SMTP integration – plus Zapier support so connections to other apps become super simple – database storage capabilities as well as helpful dashboards stats.
Save Submissions To Database
One of the biggest issues with the regular Divi Contact Form module is that emails are not saved in the database. This means that users have no way of accessing past submissions, which can be a major issue if they need to quickly access customer information or respond to inquiries in a timely manner.
Divi Contact Former Helper plugin is the perfect solution to keep your contact form submission information safe, secure, and organized. With incredible features such as viewing, sorting, exporting replying & backing up – you can easily manage all communication from website visitors in one place.
File Uploads
By default, Divi contact form module does not have an option for file uploads but with this plugin, users have the ability to attach files directly to their contact forms – making it easier than ever before for your visitors and customers to get in touch.
Date/Time Picker
With Divi Contact Form Helper, you can unlock a world of options to customize your contact form into the perfect booking plugin! Empower yourself with the date and time picker settings that let you do everything from scheduling appointments to hosting online meetings. Make sure every request is met on-time — without putting in any extra work.
See all of this plugin features
Divi Form Builder by Divi Engine
Form Builder by Divi Engine allows users to create powerful forms with no coding required. With this plugin, you can easily add multi-step forms, radio images, file uploads, frontend post creation, custom form fields mapping, conditional logic, spam protection, and much more.
Multi-Step Forms
Form Builder also allows users to create multi-step forms, allowing customers to break down their information into multiple pages. This makes it easier for customers to fill in long forms without feeling overwhelmed by a single page of questions.
Radio Images
Divi Form Builder allows users to add visuals to their form fields with the help of radio images. You can now replace the radio buttons with appealing images.
See all features of Divi Form Builder
Divi Contact Form 7 Styler (Free)

The Free Contact Form 7 Styler plugin is the perfect solution for anyone who wants to work with Divi Builder and contact form 7.
Achieve the perfect combination of design and functionality with Free Contact Form 7 Styler! This creative plugin allows you to leverage Divi’s custom styling choices together with Contact Form 7 for a truly exceptional user experience.
See all features of Divi Contact Form Styler
Examples of Divi contact form module
I will give you 3 examples of contact forms that I have created in Divi Builder for your inspiration. All of these designs can be created with the form module settings.
Example 1 (Kali)
This is an example from my Kali design. You can see a live demo here.

Example 2 (DiviSEO)
This one comes from my DiviSEO design and you can see the demo here
Example 3 (Atlas)
For this one is from my Atlas design and you can see the demo here.
Alternatives for the Divi contact form module
With the Divi builder, creating contact forms for your website is incredibly easy. But if you’re looking for a different way to reach out to your users without the hassle of coding and pesky emails, there are several alternatives that make it just as simple. Solutions such as Fluent Forms, Formidable Forms, and Ninja Forms offer versatile functionality to improve the quality of customer service on your site.
From built-in spam filters to chatbot integrations, these helpful services provide creative and reliable methods of communication with your downstream audience. Ultimately, with the right contact form plugin, it’s easy to create intuitive forms so customers can contact you no matter what device they’re using.
Fluent Forms
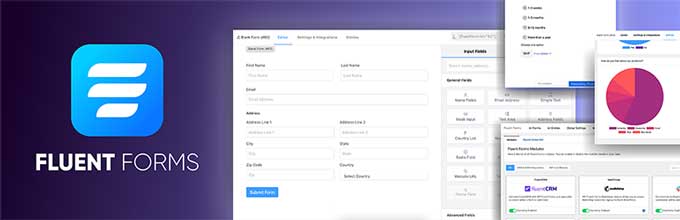
Fluent Forms is a revolutionary WordPress Form builder plugin developed to offer website owners the ultimate user experience. Featuring a drag-and-drop interface, a plethora of premium features, and unique additional capabilities, this plugin makes it easy to integrate forms into any website without needing to code.
With Fluent Forms, users have access to powerful customization options and unique form builders that enhance the overall interactions between their websites and customers.
See all features of Fluent Forms
Ninja forms
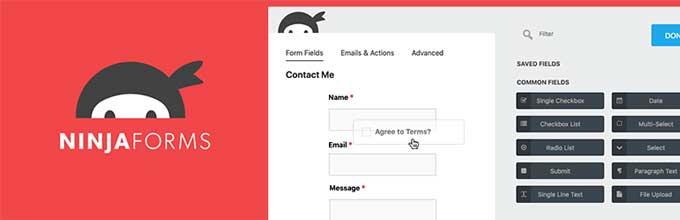
Ninja Forms is easy to use but powerful plugin that allows you to create professional WordPress forms with minimal development know-how. With a drag-and-drop interface, it’s never been easier to customize the look and feel of each form, working with settings like radio buttons and checkboxes to maximize user experience. Plus, Ninja Forms includes helpful tutorials and support that make mastering the art of creating effective forms a breeze.
See all features of Ninja Forms
Formidable Forms

Formidable Forms makes it easy for WordPress users to create powerful, engaging forms without requiring any coding knowledge. Go beyond simply creating contact forms and expand into surveys, quizzes, and other custom elements with the drag-and-drop form builder.
Advanced features such as conditional logic, multiple field types, and the ability to combine data into lists enable you to customize your forms just the way you need them. Create virtually any type of form with Formidable Forms and make content selection easier with integrated search, sorting, and filtering features. Make collecting data a breeze while providing an enjoyable experience for your users.
See all features of Formidable Forms
Faq
Yes, Divi comes with a contact form module that allows you to add forms to your website with ease. You can customize the form to your liking.
By default no, but with the help of the Divi Contact Form Helper plugin, you can easily set up file uploads on your contact form. This will allow customers to attach files directly to their contact forms.
Yes, you can! Just separate each email address with a comma and they will all receive the emails sent through your contact form. This is a great way to ensure that each customer’s message reaches the right person.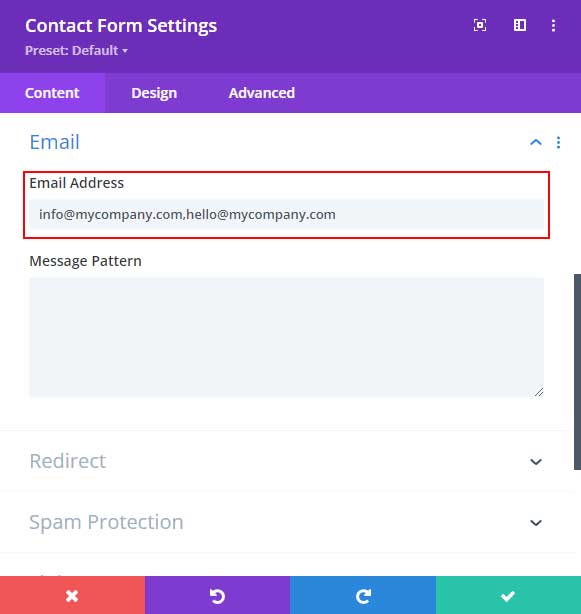
Yes, the Divi contact form module comes with tons of styling options. This includes changing colors, fonts, spacing, and more.
Yes, with the help of Google reCAPTCHA, you can add a reCAPTCHA field to your Divi contact form. This ensures that only real people can submit inquiries on your website.
Follow the steps in this tutorial: How to set up a reCAPTCHA for Divi.
Yes, it does! If you prefer to use Contact Form 7 then you can easily integrate it with the help of the free plugin Divi Contact Form 7 Styler. This allows you to style your CF7 forms in just a few clicks.
Conclusion
Creating effective Divi forms for your Divi website is essential to providing an enjoyable user experience. With the help of the Divi Builder, you can easily create powerful forms with minimal effort. Divi provides an easy-to-use contact form module that allows you to customize the look and feel of your forms. With these tools at your disposal, there’s no reason not to get started on creating effective contact forms for your website today!
If you have any questions please leave a comment below.
