


Divi theme is the best way to make a website without any coding required.
Creating a website with Divi is easy! With its simple drag-and-drop builder, you can create any kind of website in minutes, without having to learn code. Plus, there are tons of free layouts available to get you started.
Not only is the Divi Theme one of the most user-friendly WordPress themes around, but it’s also one of the most powerful. So whether you’re just starting out or you’re a seasoned pro, Divi has something for everyone.
Table of contents
- Introduction
- Step 1: Get a Domain Name and Web Hosting
- Step 2: Setup SSL (HTTPS) for your domain (FREE)
- Step 3: Install WordPress CMS system (FREE)
- Step 4: Install the Divi theme
- Step 5: Install a free Divi layout pack
- Step 6: Customize the look and feel of your website
- What’s next?
Introduction
Having over a decade of experience in web design, I’ve built hundreds of websites for clients. These days I am fully committed to building Divi child themes and Divi layouts for the Divi community.
You can see my designs and layout packs on my Divi marketplace.
Right now, my designs are used by thousands of other web designers across the globe. But not all of us have the same technical expertise. And to be honest, that doesn’t really matter when it comes to building a website. Yes! You’ve read right! At this point, anyone can build a website.
You don’t need to have any experience or technical skills to do that. With the wide range of incredibly efficient web designing tools and platforms- there’s never been an easier time to make a website on your own.
In the following section, you will find a step-by-step guideline for building your very first Divi website.
Step 1: Get a domain name and a Web hosting plan
In order to get started with WordPress, you will need two important things-
A domain name (which is the web address of your site, something like (thenameofyoursite.com)
Hosting (the service that’ll connect your online platform to the internet)
Choosing the right web hosting platform is perhaps one of the most essential parts of starting a website.
Here, you should make it a point to choose a platform that is not only reliable and backed by excellent customer support but is also equally affordable.
I would recommend SiteGround as a hosting platform (this is one of the hostings I use) because of its simplicity and user-oriented services. Here are some more reasons that’ll convince you why I’m vouching for it.
See also this recommended list for finding a great Divi host.
- Lets you install WordPress in a single click.
- Free Let’s Encrypt SSLs (secures your website).
- Offers 24X7 customer support.
- Loads your website really fast.
- SiteGround is recommended by Elegant Themes (the company behind Divi)
- 80% discount
Now that you’re aware of the benefits this platform comes to offers, here’s how you can start out on SiteGround:

Step 1: Go to SiteGround
Go to the website of SiteGround– In order to get started with this hosting solution, you’ll first have to head to the website of SiteGround and click on the choose plan’ option.
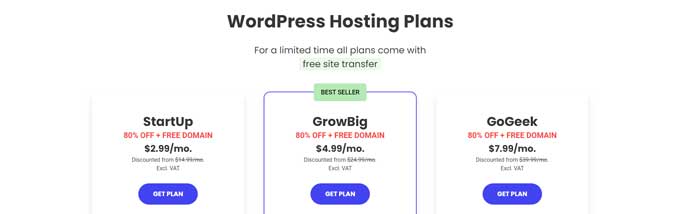
Step 2: Choose your plan
For this next step; you’ll have to choose a hosting plan for your website. Having said that, don’t stress out about the different packages, because you can always upgrade them as and when you need them.
If you’re a beginner, you can always try the StartUp package. This is a great choice for new websites and right now it is available at a discount of 80%. Once you’ve chosen this hosting package, click on the option called “Get Plan”. This will redirect you to the option of selecting a domain name.
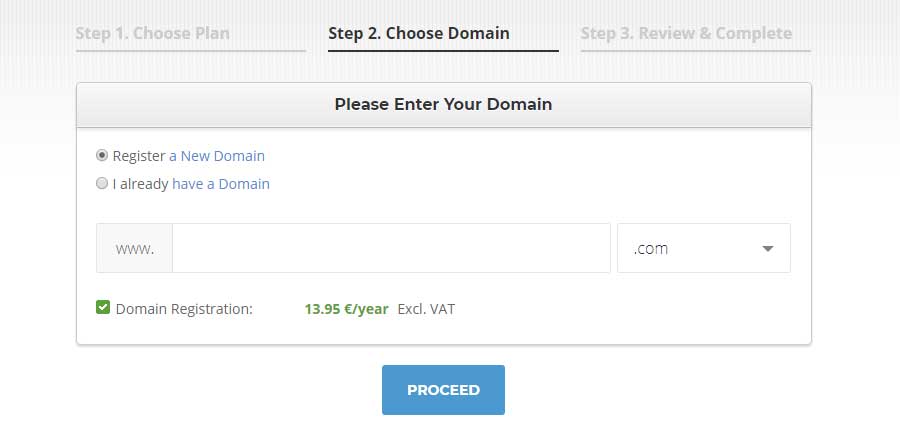
Step 3: Choose your domain name
The domain name of your site is going to be the web address via which people are going to identify you and access your website. In other words, your site’s domain name is websitename.com.
In case you have a domain name already, check the box called I have a domain name already. After this, click on proceed to carry on with the remaining process. If, however, you don’t have a domain name of your own; click on the option called Register for a new domain’.
While you might already have some ideas for selecting your very first domain name, here are some additional guidelines for the ones starting out:
- If you are making a website for your company, use a domain name that syncs with your company name. If however, you are making it for yourself, then add your name in the domain name section.
- Do not use any extra characters other than alphabets (including hyphens)
- If available, use .com, because this is the easiest for people to remember.
Step 4: fill in your Details
This is the section where you add your contact details and pay for your web hosting plan. Here, right under the purchase information, click on the option called hosting services.
There, you will find yet another option called data centers. In this section, choose the location of your nearest data center. If your customer base is primarily from USA, then choose USA in this section.
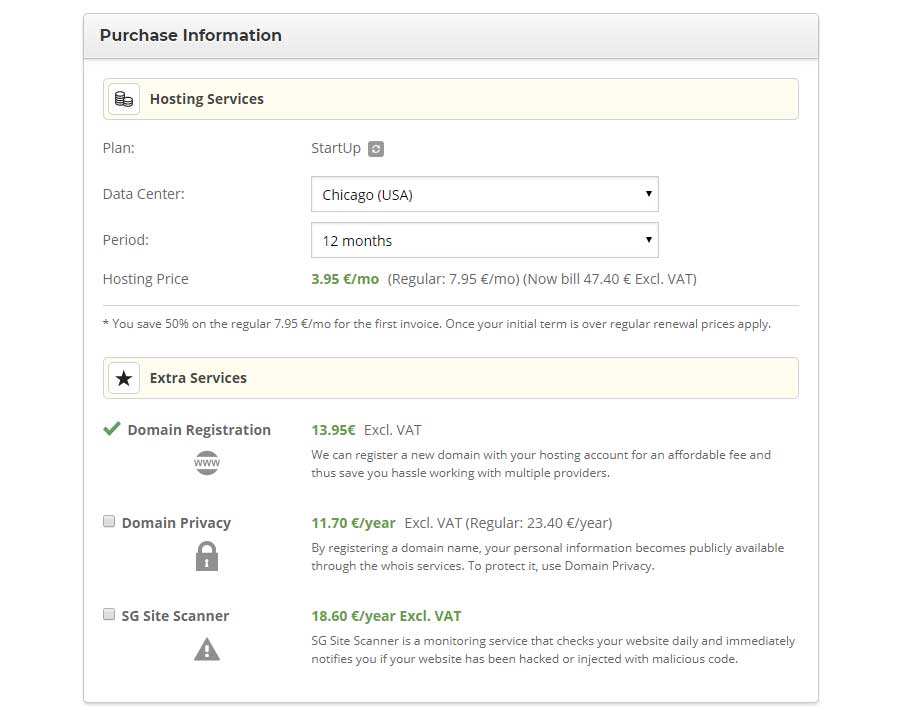
While you create your first domain name, you will also get the option of adding domain privacy. (This will keep your personal information (including your name and address anonymous).
You can also add an SG site scanner for scanning your website for malicious software. Both of these options are optional.
Things to do before the next step
- Choose a domain name and set up a hosting package. I recommend choosing SiteGround as your hosting.
Step 2: Set Up your Domain’s SSL
Once you’ve purchased your domain name and have set up a proper hosting plan, you’re one step closer to building your website. In the second step, we will focus on securing your website with SSL (https).
Right now you might be wondering what exactly is SSL and how is it going to impact your website. I’ll keep it simple. SSL is the acronym for Secure Socket Layers.
As evident from the name, an SSL certificate in your hosting account is going to provide much-needed security for your website. When your website is secure, you will see a green padlock icon in your address bar, and instead of starting with HTTP; your web address will now start with HTTPS. Here, the S stands for security.

If your website starts with HTTP instead of HTTPS’; the Google Chrome browser will automatically flag it as a non-secure site. Here, even if you’re not accepting payments via your site, seeing the non-secure icon is not really going to provide a great user experience.

You’re already aware of how difficult it is to garner people’s attention. And having something negative is definitely going to add an adverse impact on this attention. But how exactly does one set up their SSL? Well, with SiteGround this is super easy to do.
Visit the SiteGround website and click on the login option (top right corner).
Right after you’ve logged in, head to the Websites tab.

On your next screen, you will see all of your available domain names and hosting packages in your case this will be likely just one. Click on the option Site Tools.
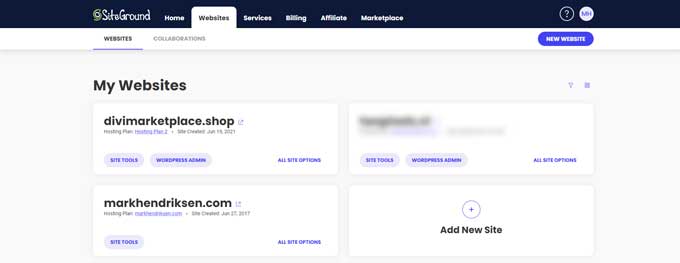
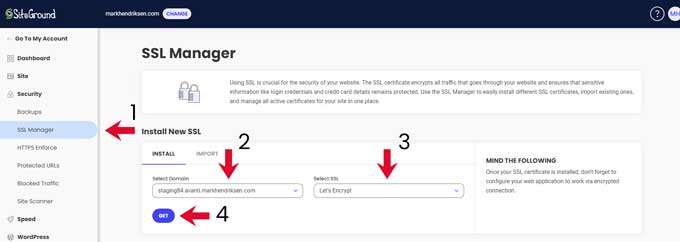
On the following screen, navigate to Security > SSL Manager. From here choose your domain name from the drop-down and select Let’s Encrypt and click on the Get button. The installation will hardly take a minute and will soon let you access your SSL certificate.
Things to do before the next step
- Set up an SSL certificate and secure your website.
Step 3: Install WordPress
Now that you’re done with the SSL certificate, it’s time to finally install WordPress. It’s super easy to install WordPress with SiteGround.
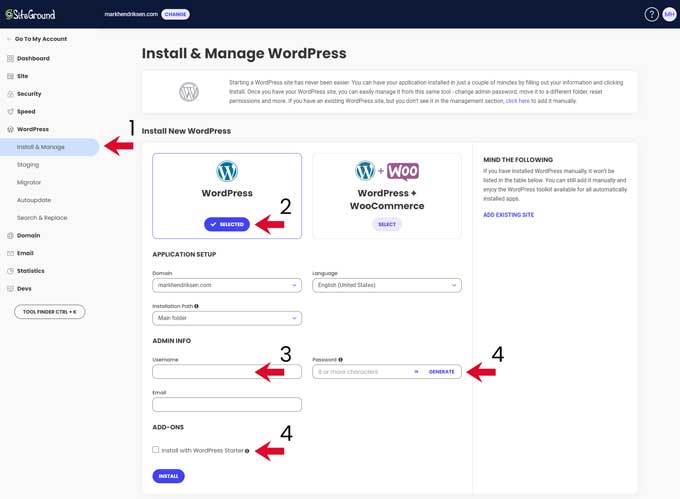
Navigate to WordPress > Install & Manage. From here select WordPress, if you want to start an eCommerce website then you can also install WooCommerce. But for this tutorial, we will just install WordPress.
Then you have to create a login for your WordPress site. I disable the option “Install with WordPress Starter”, this option will autoinstall a popular WordPress theme and plugins, but we are going to use the Divi theme so we do not need those.
Your WordPress website is now been installed and you can access it by clicking on the button Admin Panel.
You can also access your website admin panel by visiting your website and entering wp-admin after your URL, which should be something like www.yoursite.com/wp-admin
Then you just enter your login information to access your WordPress dashboard.

Things to do before the next step
- Installing WordPress on your domain name
Step 4: Install the Divi theme
After you’ve finally installed WordPress on your domain, you will find a pretty basic and clean website.

But having said that, you don’t really want your website to look like your competitors’ websites; isn’t it? And that is exactly why you’ll need a good theme and design template that’ll keep your site an edge ahead of others.
I have specialized in the Divi theme from Elegant Themes and it is for me the #1 theme out there. I build all of my client’s websites with the Divi theme.
Divi has tons of customization options and you can literally build any type of website with it. And the best part is that it has a live page builder.
To keep up to date with the latest Divi features I recommend checking out my own customized Divi changelog. This one is a bit simpler to follow than the original one on Elegant Themes.
Setting up the Divi theme
Divi pricing plans offer 2 packages. The difference between the 2 is lifetime access, updates, and support.
Head over to Elegant Themes.
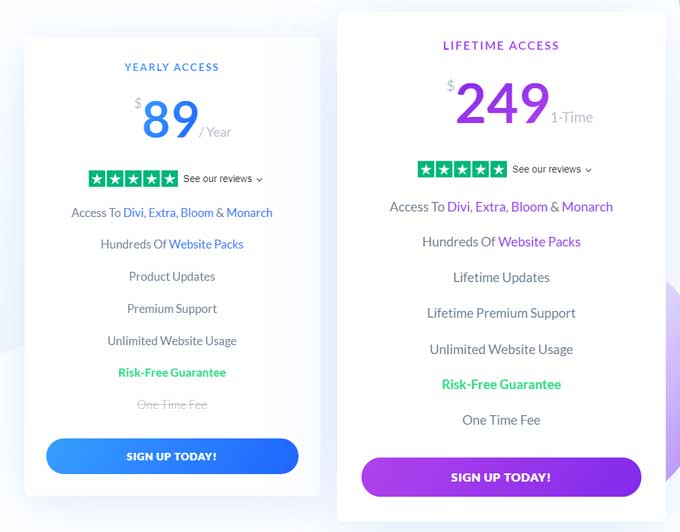
If you choose yearly access then it doesn’t mean that your website won’t work anymore after that year. It will just keep working you just don’t have access to new updates and features after that year.
You can check this link for the latest Divi discount codes if there are any available at the moment.
Not only do you get access to the Divi theme but you get hundreds of free website templates + all of their plugins.
With most of the premium themes out there, you can only use them once per website. With Elegant Themes, you can use the Divi theme as many times as you like on as many clients as you want.
So this is a pretty sweet deal.

Installing Divi
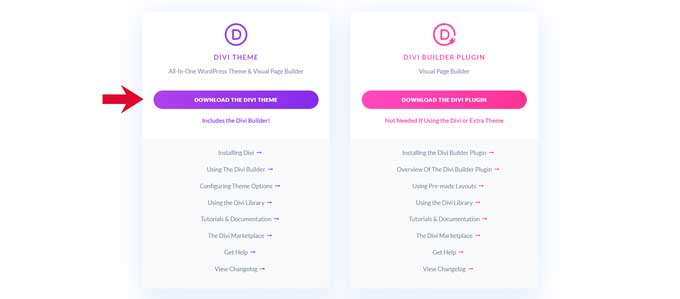
When you finished the signup process head over to their website en log in. In your member area, you can download the Divi Theme.
You will see 2 options here, the Divi theme which includes the Divi builder plugin, and the stand-alone Divi builder plugin.
You could use the Divi builder plugin for another WordPress theme if you wanted to.
But for this tutorial, we are going to use the first option the Divi theme.
Save it somewhere on your computer.
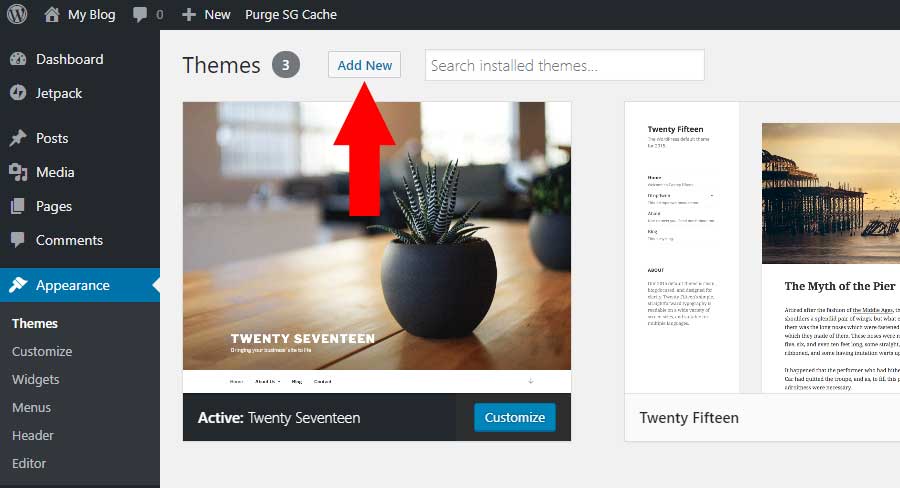
Now head back to the dashboard of your website and go to appearance > Themes.
And click on add new
Then click on Upload Theme.
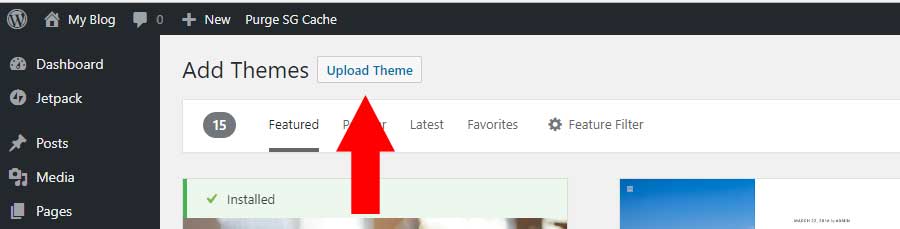
On the next screen, you can upload your theme. Click on Choose file and find your downloaded Divi theme. Then press install now.
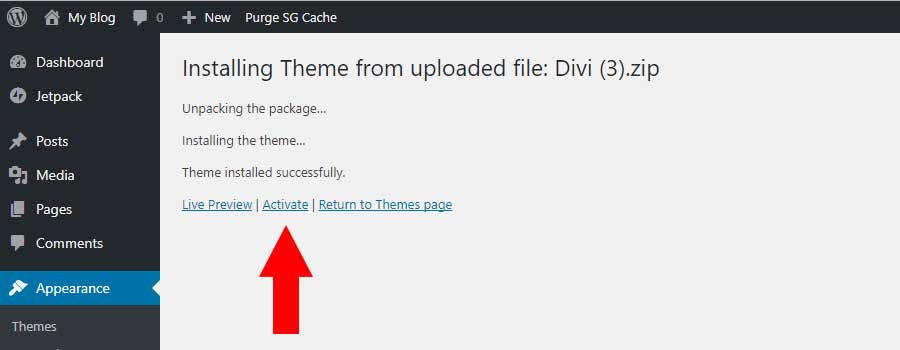
After the upload process has finished you can then activate the Divi theme.
Things to do before the next step
- Installing and activating the Divi Theme
Step 5: Install a free Divi layout pack
Now that the Divi Theme is installed, we have to set some basic settings first, before we can install a layout pack.
In WordPress navigate to Pages > Add New.
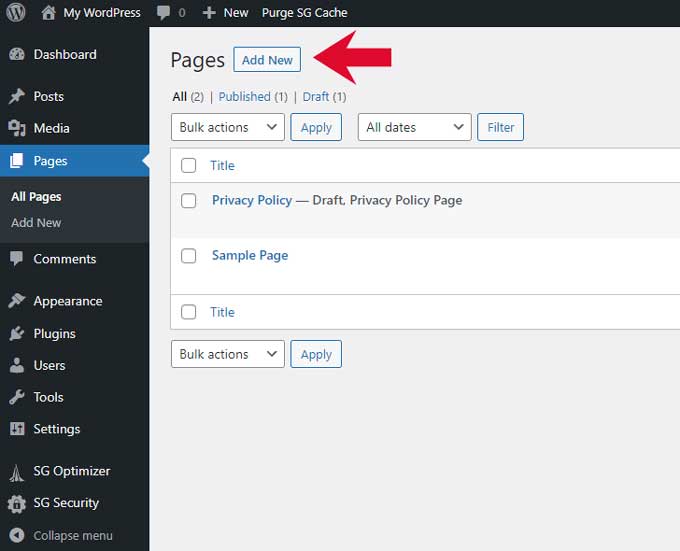
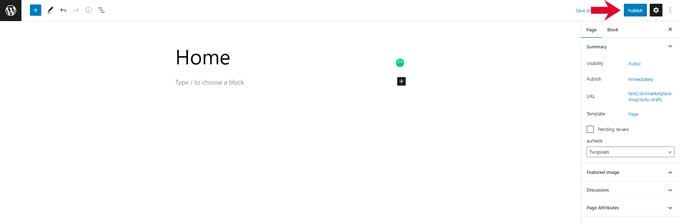
Give this new page the name Home and publish it.
Now navigate to Appearance > Menus.
Fill in a name for your menu and check the option, Primary Menu. After that click on the button Create Menu.

Check Home and click on the button Add to Menu, after that click on Save Menu.
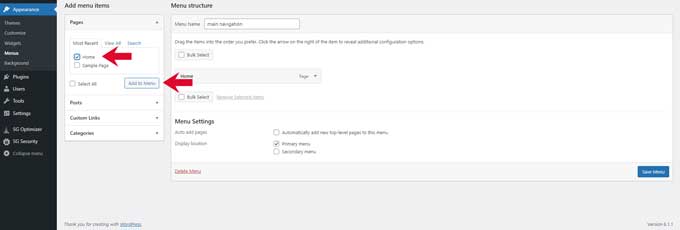
We have just created a Home page and a menu for our website.
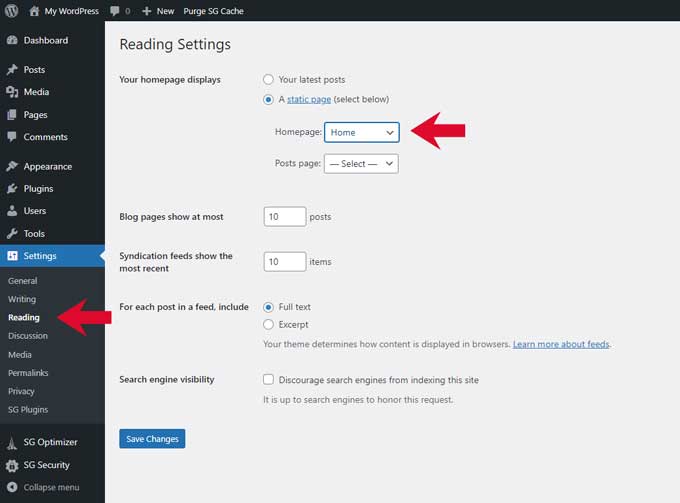
Now navigate to Settings > Reading.
Enable A Static Page and choose Home from the dropdown. Then click on Save Changes.
So this is what we just did. We created a new home page and a menu Then we added the home page to this menu.
And we made the home page the first page of our website, so when you visit your domain name for example www.mycompany.com then you land on the home page.
Install a free layout pack
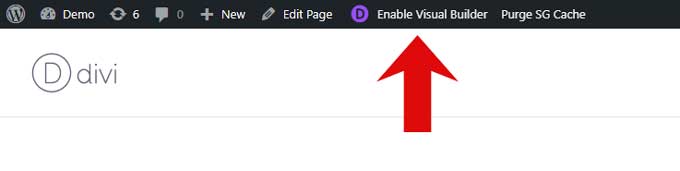
Divi comes with hundreds of free layout packs that you can use to build your website. To access them go to your home page (on the front end) and enable the visual builder.
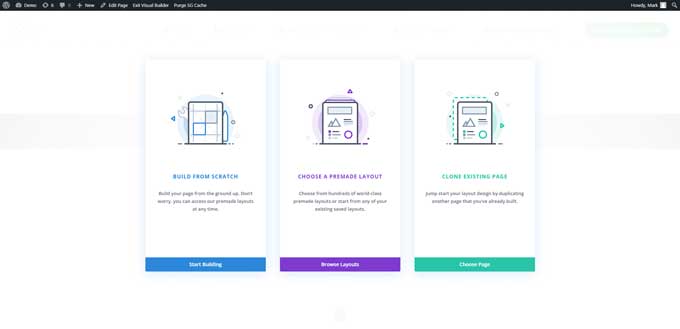
A new screen will pop up and choose the option Choose a premade layout.
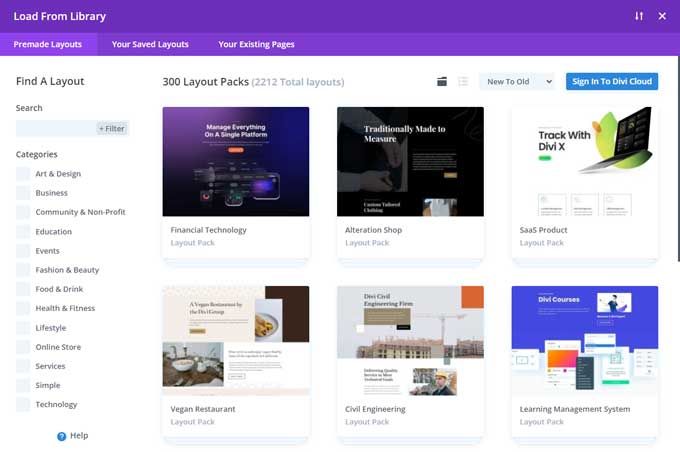
In the next window, you can choose a premade layout pack. On the left side, you can use the filter options.
After you click on a layout, you get the page options for that layout pack. This is the home page so I will choose the home page layout and then click on the button Use This Layout.
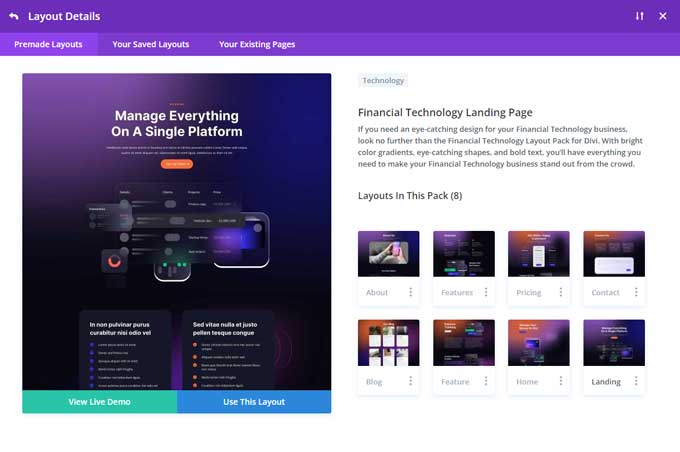
And there you go you have successfully imported a complete page layout.
You can do the same process for other page layouts.
Create a new page in WordPress (Pages > Add new). Then add that page to your menu in Appearance > Menus
After that go to your page in the front end and enable the visual builder and import a page layout.
Things to do before the next step
- Set some basic settings in WordPress
- Installing and uploading a free layout pack
Step 6: Customizing the appearance of your website
Now that you’ve completed installing a layout pack for your site, it’s time for you to customize its colors and content. The process is easy and is usually completed at the front end of your site. To start out, simply click on enable visual builder and you’ll soon find options for customizing your site.
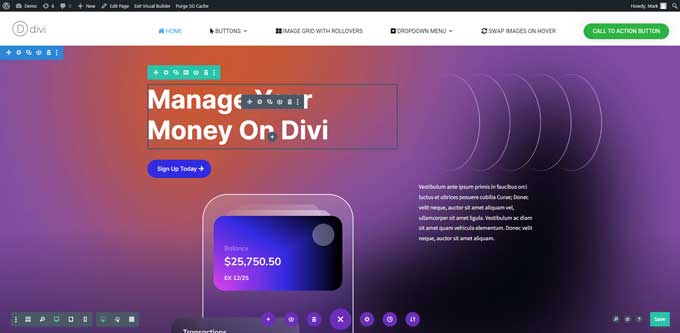
This is your Divi builder interface and it uses sections, rows, and modules. You can customize any element of your website.
Divi comes with a great collection of video tutorials. To understand the basics of Divi I recommend watching at least the basic video tutorials. You can find them here.
Basics Divi builder
https://www.elegantthemes.com/documentation/divi/visual-builder/
Full documentation
https://www.elegantthemes.com/documentation/divi/
I have built a library of step-by-step Divi Tutorials and Guides from beginner to advanced levels. This is a great way to learn Divi and become a better web designer.
What’s next?
There is an incredible community of third-party developers for the Divi Theme and I encourage you to explore them.
The Elegant Themes marketplace is a great place to discover new Divi plugins which will add additional features to your Divi websites. From additional hover options to custom drop shadows.
Or if you want to create a WooCommerce website then you can find amazing custom Woocommerce modules with interactive elements, custom cart, and checkout pages with advanced custom fields.
Not only can you find Divi plugins on the marketplace but also Divi child themes. Child themes are custom templates with more advanced options to create websites. They come often with custom templates for the theme builder such as a header and footer layout, a custom post template, and a search results page.
To gain a deeper understanding of web design in general, I recommend reading my article on outlining website. It provides insights on how to initiate the website-building process.
Create your own Divi child theme
When you become better at building websites then you can start creating a Divi child theme.
I recommend following my tutorial for creating your own Divi child theme. This tutorial will explain what it is and how you can create one yourself.
Other Elegant Themes Products
With your Elegant Themes membership, you have access to other products as well.
Extra theme
This is a WordPress theme for a magazine-type of website. Extra is built on the Divi Builder, which is a very reliable foundation. The Divi Builder lets you create beautiful and unique post and page layouts without writing any code.
Bloom plugin
Bloom is a Divi plugin that helps you grow your email list by adding email opt-in forms to your website. These forms can connect to your email marketing or email newsletter software, making it easy for you to collect new leads and subscribers.
Monarch plugin
Monarch is a Divi plugin that helps you to get more social shares and followers on networks such as Facebook and Twitter. Monarch does this by using various different social sharing integration methods, such as social sharing sidebars, inline sharing buttons, popups, and fly-in boxes.
And Elegant Themes also have some additional product that you can get:
Divi Cloud
Divi Cloud is a service that lets you save files and access them from any computer or device. It’s like Dropbox, but for your Divi websites.
Divi Teams
Divi Teams allows you to invite people to join your Elegant Themes account. You can also control what each person can do. For example, you can give team members access to Divi and our other themes and plugins.
Congratulations!
Well, now that you are done with the plugins- Congratulations! You’re completely ready for launching your website. If you’ve followed all the steps in my guideline, you should already have your interactive and incredibly functional Divi website right now. That wasn’t too difficult, was it?
Frequently Asked Questions
The Divi theme comes with 2 pricing options. A yearly fee of $ 89 or a one-time payment of $ 249 for lifetime access. Both options include the plugins, Bloom and Monarch.
The Divi theme is a WordPress theme that uses a drag-and-drop page builder. With this builder, you can create beautiful websites without the need for any coding skills.
The Divi theme has the Divi builder in it. With the Divi theme, you also have options for the header and footer. The Divi builder plugin can be used on any other WordPress theme. You can then create pages with the Divi builder and use the other options of the theme.
In your dashboard go to Appearance > Themes. Click on Add New and on the next screen click on Upload Theme. Locate your download file and start the upload. After the upload has finished click on Activate Theme.
Yes, you can use the Divi theme on multiple websites.
Yes, Divi is very easy to use. The Divi theme comes with a drag-and-drop visual page builder. With the visual builder, it becomes very easy to build websites.

Thank you a lot, Mark!
Nice tutorial. Thank you, Mark.
Hello i first want to start of by saying that your free construction layout pages for divi are awesome. I have everything set up but just cant do one thing and that is change the construction logo on the left. Is there anyway to do this?
Any info would be great thanks
Hi Shawn,
Go to Divi > Theme options
There you can upload a new logo.
Thank very much Mark
Your welcome Mike
Thank you for this great guide, Mark. I’m a big fan of Divi, too. 🙂
Nice guide and free layout pack!
I’m only missing some advice about GDPR compliance. Do you have any tipps about that?
Great post. Thank you very much