


You want to add some hover effects to your Divi modules, but you’re not sure how.
Adding custom hover effects to your Divi website can be a great way to make your website more interesting and engaging for your visitors.
With this easy-to-follow guide, you’ll be able to add hover effects to any Divi builder in minutes.
Table of contents
- How do I add hover effects in Divi?
- How do I add a hover effect to the Divi image module?
- How do you add a hover effect to the Divi blurb module?
- Divi image hover module
How do I add hover effects in Divi?
It is very easy to apply Divi hover effects to your website. Not only are they easy to find, but you can apply Divi hover effects to almost any section, row, or module.
Just select the element you want to get creative with and Divi’s options panel will let you customize its appearance on hover.
Whether it is a transition from one color to another or an animated transformation, Divi’s hover effects give you the power to make your Divi page stand out from the rest!
I will give you an example of a button module, the button has a red background color and I will make it orange on hover.
When you hover with your mouse over the element title, some options will be visible. Click on the little arrow to open up the hover options.
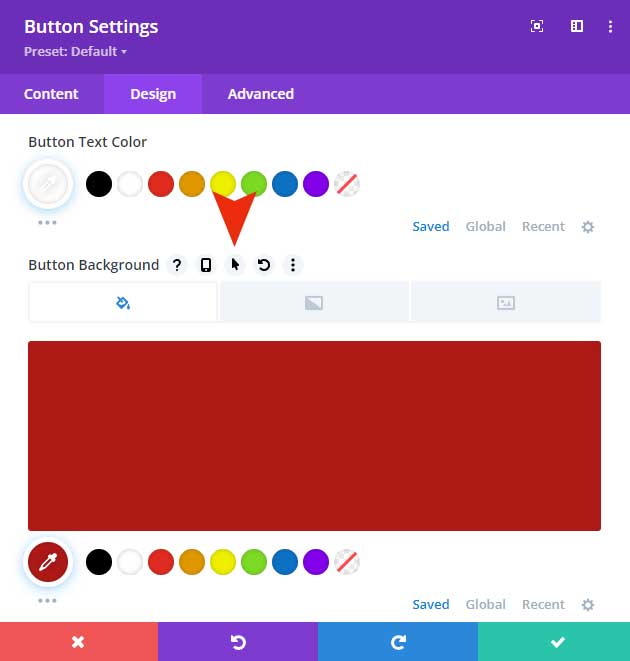
Now you can click on the hover tab. And now you can set a background color for the hover state of this button.
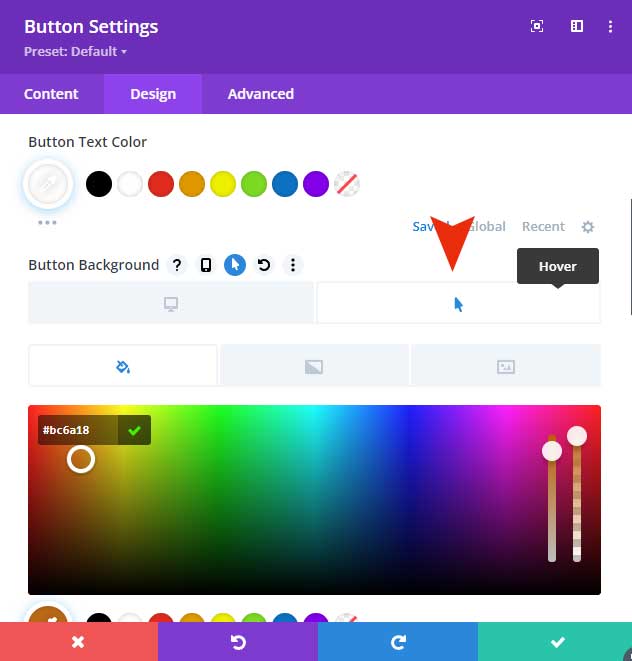
This works the same for any other element like font sizes, text colors, shadow effects, background image, etc.
In the next sections, I will give you some examples of the most popular hover effects for some of the Divi modules.
How do I add a hover effect to the Divi image module?
With the image module, you can do a ton of really cool hover effects. I will give you some examples of popular Divi image hover effects.
Divi image swap
Open your image module and expand the image tab. Place an image in the default state tab and then switch to the hover tab and place an image here.
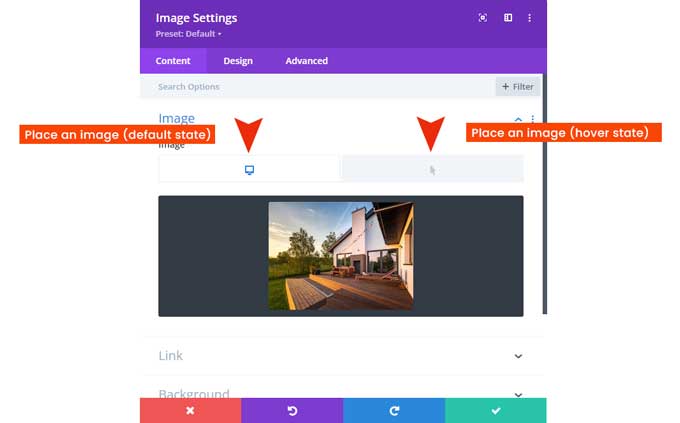
Make sure your image size for both images is the same. When you hover over your image it will change to the second image (you need to disable the visual builder).
You will notice that the image transition duration is instant. Divi does come with transition options however, they do not work for image swap.
You can follow this tutorial, “How To Swap Image On Hover” to swap out images in Divi with a transition effect with some custom CSS.
Create an image overlay on hover
First, you have to place a link in your Divi image module. You have to do this in order to enable the overlay options for the image module.
This can be a dummy link.
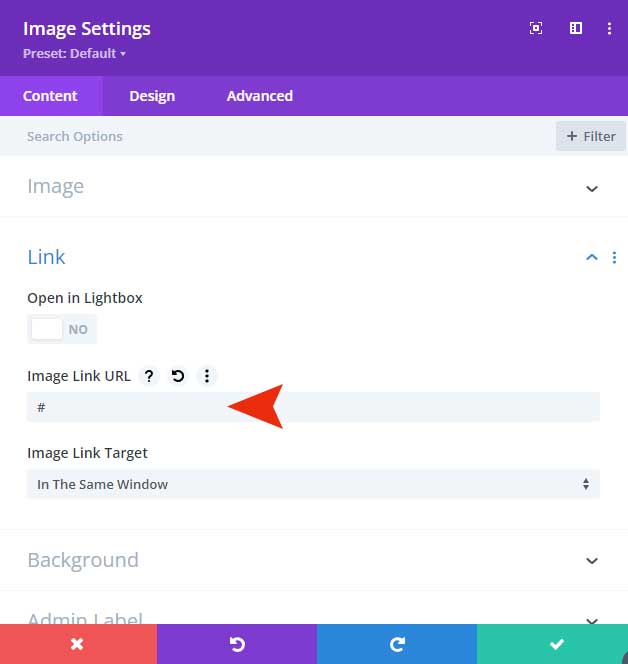
After that switch to the design tab and you will notice that the Overlay tab is visible. This is only visible when you have added a link.
From here you can add a hover overlay background color and icon.

I recommend following my Divi image overlay tutorial to add advanced hover effects to your Divi overlay images.
How do you add a hover effect to the Divi blurb module?
You can create all sorts of hover effects for your Divi blurb modules in the Divi theme. I will show you 3, and explain which Divi module settings I have used to create the hover effects.
These are the 3 blurb modules I have created:

I assume you know how to populate the blurb module so I will only cover the hover effects that I have used.
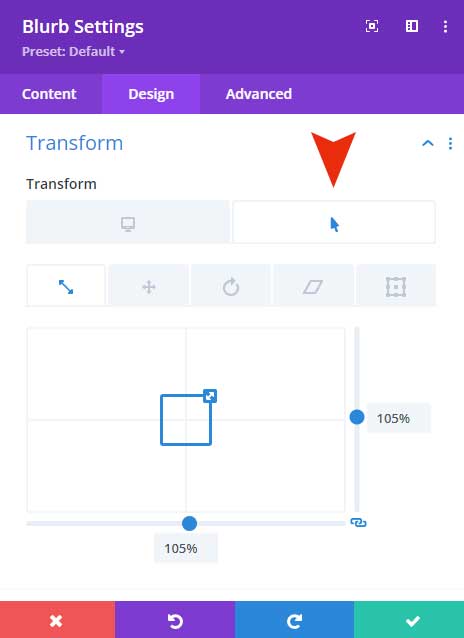
First blurb module
For the first module, I used a transform scale setting on the hover state. You can find this option under the Design tab > Transform. I set the hover state to 105%, so when you hover over the blurb module it will increase in size.
Second blurb
For this blurb, I removed the shadow and replaced it with a border on hover. When you have added a shadow, you can then change the shadow color for the hover state, I set this to fully transparent.
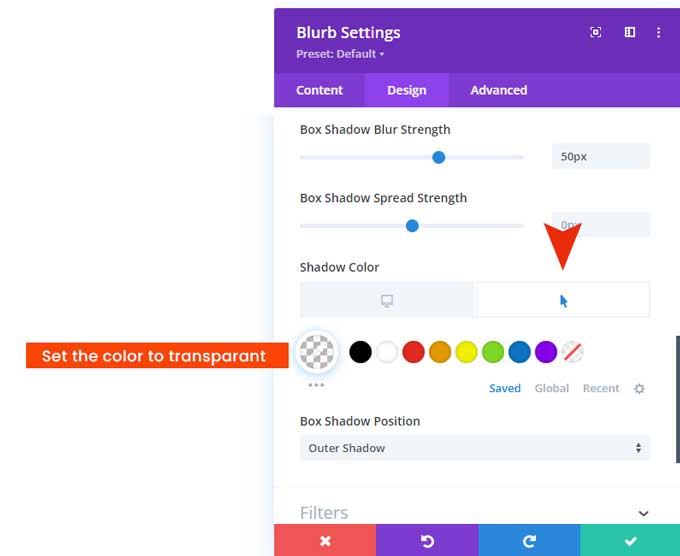
The border needs to be visible only on hover, to do this set the default state of the border color to fully transparent, and the hover state to a grey color.

Third blurb
For the last blurb, I have set the background color on hover to black (set the default color to white). You can swap the image with the same method as I have explained in the previous section. I have then changed the title text and body font color on hover.
Divi image hover module

The Divi image hover module allows you to add hover effects to your images. This Divi plugin comes with more than 250 animations for your Divi images. It is the most versatile plugin for your images that is available on the Elegant Themes marketplace.
Key features
- 250+ animation types
- 5 hover effects for image swap
- Style the lightbox
Conclusion
Adding Divi hover effects to your website is a great way to make it more interesting and engaging for visitors. With this easy-to-follow guide, you can add hover effects to any Divi builder in minutes.
If you have any questions please let me know in the comments.
