


In this step-by-step tutorial, you will learn how to add a reCAPTCHA to your Divi contact form and protect your site from spam.
Have you ever felt frustrated dealing with contact form spam? If so, you’re not alone. That’s why it’s essential to take extra steps to ensure that your Divi site remains secure and that any contact form submissions come from genuine users.
In this step-by-step guide, we will discuss how to add reCAPTCHA protection to the Divi Contact Form module—a must-have for any Divi web designer looking to keep their website safe and data integrity intact!
We’ll look at what exactly reCAPTCHA does, explore the benefits of having it on your contact forms, and then demonstrate step-by-step how easy it is (yes–it’s very possible!) to install it onto your own site in just a few minutes. So let’s get started!
Table of contents
- What is Google reCAPTCHA and why it is important
- Step 1: Enable Use a Spam Protection Service
- Step 2: Create a Google reCAPTCHA account
- Step 3: Add your site and secret key to your Divi form
- Step 4: Hide the Google reCaptcha badge
What is Google reCAPTCHA and why it is important
Google reCAPTCHA is a system designed to help websites distinguish real visitors from robots. It does this through a series of tests that require humans to provide proof of their humanity. Adding reCAPTCHA to your Divi contact form provides an extra layer of protection from spam so that you can focus on real conversations and make sure your site remains secure.
By integrating reCAPTCHA into your form, you’re reducing the chances of malicious activities like spam submissions and fake signups. Not only will this help protect the security of your website, but it will also prevent false responses from cluttering up your inbox! With Google reCAPTCHA, you can be confident in securely managing communication with visitors to your site.
Step 1: Enable Use a Spam Protection Service
In the contact form settings of your Divi form scroll down to Spam Protection and you will see that by default the Basic Captcha is enabled. The Basic Captcha is spam protection with a simple math question.
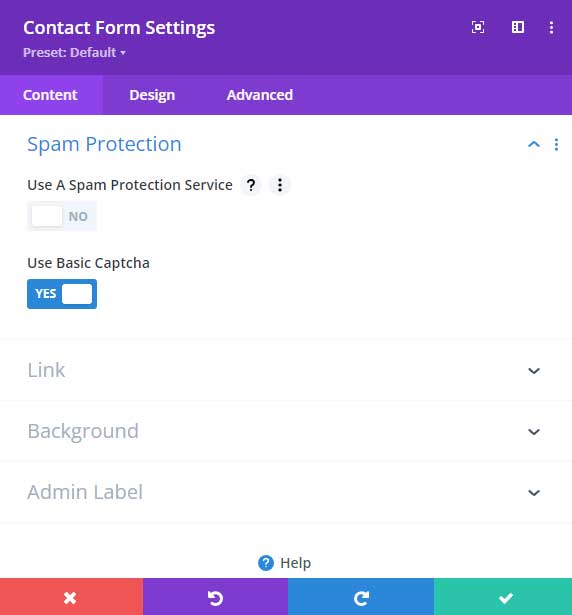
In order to use Google reCAPTCHA you have to enable Spam Protection Service. When you have done this you can click on Add.
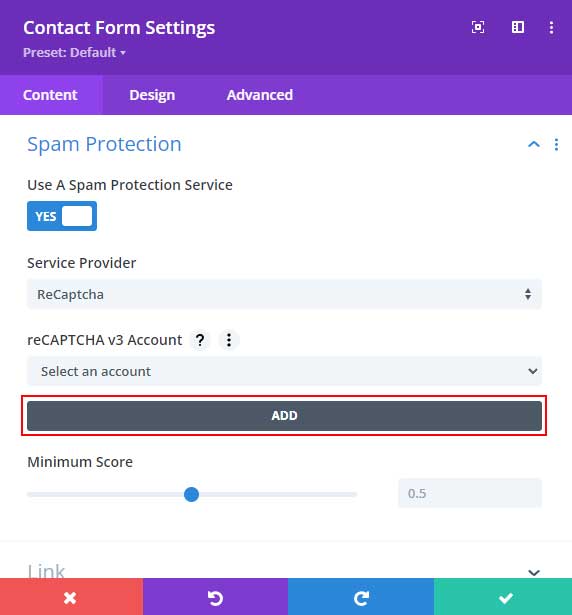
After that, we have to fill in the account name, site key, and secret key.
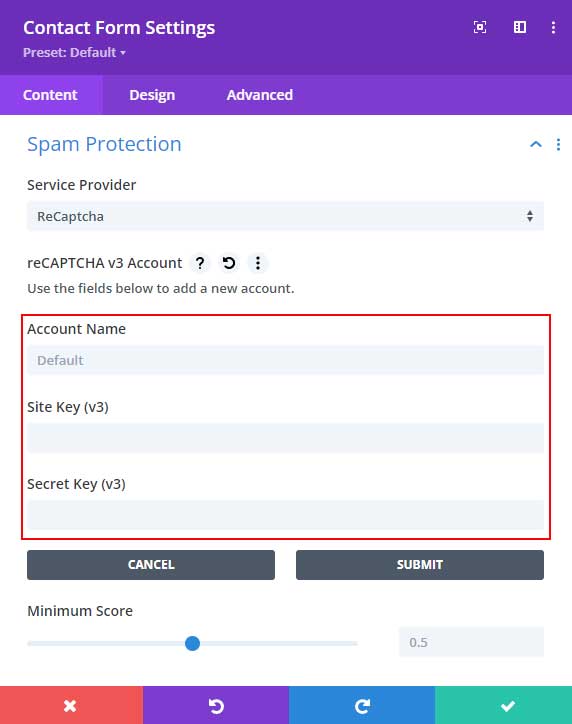
In the next step, we will be creating a Google reCAPTCHA account so that we can fill in our account name, site key, and secret key.
Step 2: Create a Google reCAPTCHA account
First, you will need to sign up for a Google reCAPTCHA account at the following link:
https://www.google.com/recaptcha/admin/create
When you are logged in you should see this form.
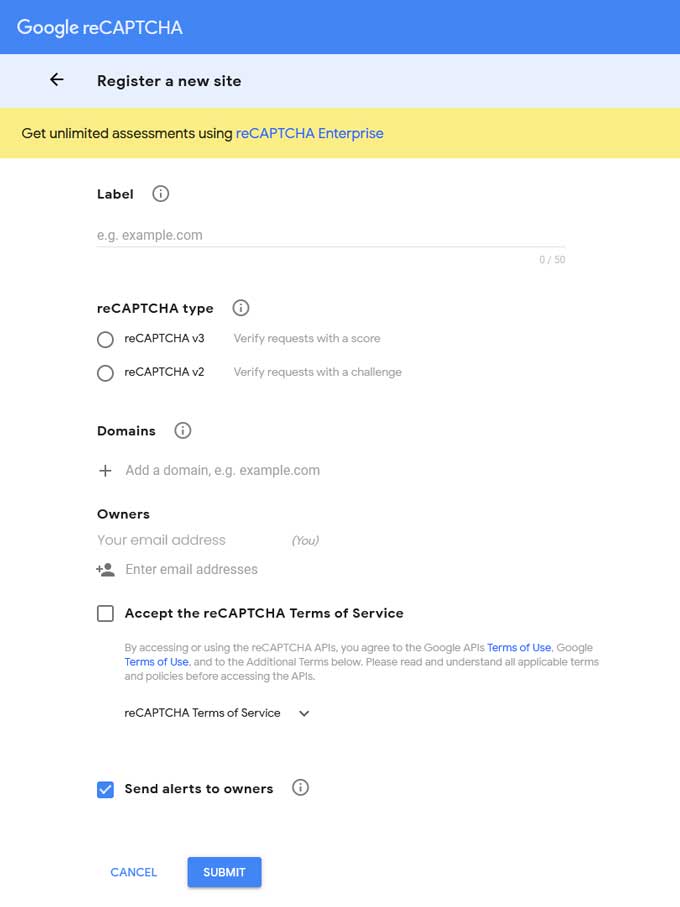
Label
To make it easier to recognize this website in the future, a “label” should be included. This label can be anything from the name of the site or its domain address.
reCAPTCHA type
With reCAPTCHA v3, users no longer have to prove that they are human by verifying a tick-box or solving a challenge. Instead, the system uses factors such as the user’s behavior and environment in order to assign a score accordingly. This score will then determine whether they should be allowed access or not – making it more user-friendly than its predecessor, v2.
Absolutely eliminating the need for interaction with a widget. However, there is a tradeoff; as this may mean that it doesn’t block as much spam and abuse as v2 does. In any case, reCAPTCHA v3 certainly simplified the process of proving one’s identity in an online world where malicious bot activity is on the rise.
For this tutorial, I will be using Google reCaptcha v3.
Domains
Enter the desired domain name for your website here.
Owners
This should be already filled in with your email address.
Accept the reCAPTCHA Terms of Service
Check this box to finish the form.
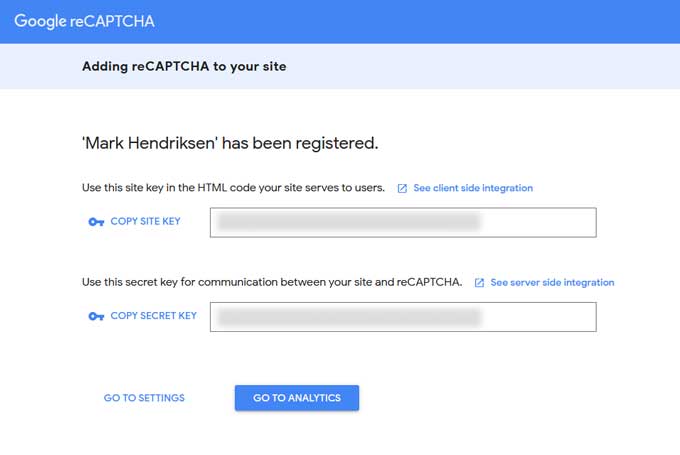
After you have submitted the form you will get the site and secret key.
Step 3: Add your site and secret key to your Divi form
Now go back to your Divi contact module and fill in the account name, site, and secret key. The account name is the label name.
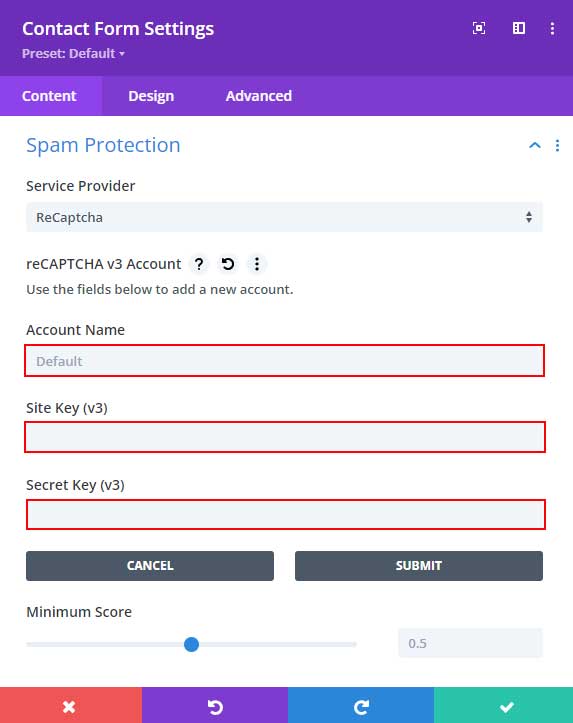
Minimum score
Google reCAPTCHA v3 has a scoring system between 0 and 1, where 1 is indicative of genuine human engagement, while 0 implies automation. Here you can set the minimum score that would be accepted as valid interaction.
I will leave this by default at 0.5 but if you still get spam from your form then you can increase this value.
Step 4: Hide the Google reCAPTCHA badge
When you have successfully integrated reCAPTCHA you will notice a reCAPTCHA logo on the right bottom corner of your website.
So the question is are you allowed to remove that reCAPTCHA badge from your website? According to Google Faq, you are allowed to remove that badge but you have to add a disclosure.
You can add a text module under your form and add the following:
This site is protected by reCAPTCHA and the Google
    <a href="https://policies.google.com/privacy">Privacy Policy</a> and
    <a href="https://policies.google.com/terms">Terms of Service</a> apply.
To remove the badge place this CSS snippet in Divi > Theme Options > CSS.
.grecaptcha-badge { visibility: hidden; }Conclusion
By following this step-by-step guide, you are now able to add reCAPTCHA protection to your Divi contact forms. ReCAPTCHA help protects against spam submissions, which is especially important for contact forms. Additionally, you are able to remove the reCAPTCHA badge and set a minimum score to ensure that your forms are only accepting genuine interactions.
If you have any questions or feedback, feel free to drop a comment below! We would love to hear from you. Thanks for reading!
