


Are you looking for an easy way to create a transparent header in Divi?
Look no further! With just 5 minutes of your time, you can make a transparent header in Divi. I provide detailed step-by-step instructions on how to do so in the most efficient way – allowing you to save time and not have to worry about finding resources elsewhere.
If you are using the default Divi menu then creating a transparent header is just switching a toggle, but when you have created a custom global header in the Theme Builder then there is no such an option.
In this tutorial, I will provide you with 3 solutions. The first 2 solutions are for headers that are created in the Theme Builder. One is for transparent headers that are not sticky and the other one is for sticky headers.
If you are not using the Theme Builder but the default Divi menu then I will explain to you how you can enable the transparent header.
Table of Contents
- When to use a Divi transparent header
- How to make a transparent header in the Theme Builder
- How to make a transparent header sticky on scroll
- How to make a transparent header in the default Divi menu
When to use a Divi transparent header
A Divi transparent header is a sleek and modern way to showcase your brand and content. Adding transparency to your header design can create a unique aesthetic that sets your website apart from others.
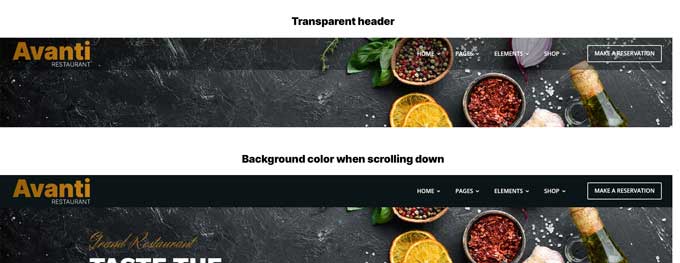
The transparent header allows your visitors to see the background image or video clearly while still providing easy access to your navigation menu. This not only looks great, but it also makes your website more user-friendly.
With Divi’s transparent header feature, you can easily customize the opacity level and add additional elements like a logo or search bar. Incorporating a Divi transparent header into your website design is a smart choice to achieve a professional and contemporary look.
How to make a transparent header in the Theme Builder
This solution is for headers that are created in the Theme Builder and will not scroll down with the page content.
If you want the transparent header to scroll down the page (a sticky header) follow the steps in the next chapter.
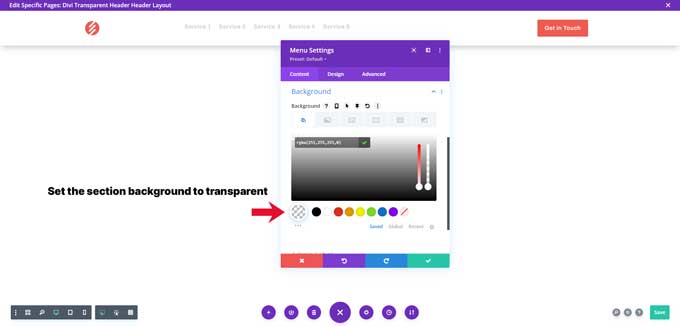
Step 1: Make the section and menu background transparent
Go to the Global Header in your Divi Theme Builder and open the section of your header. Go to the background tab and make the background color transparent.
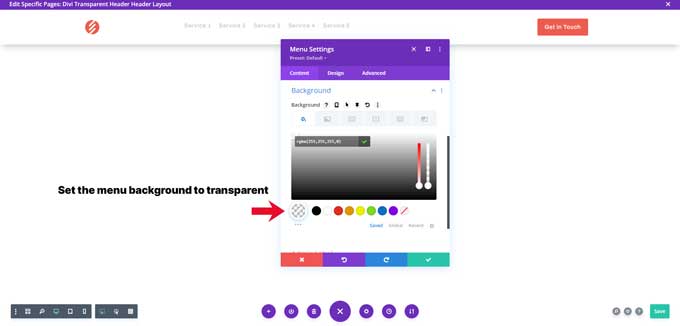
Then open your Divi menu module and make the background color transparent.
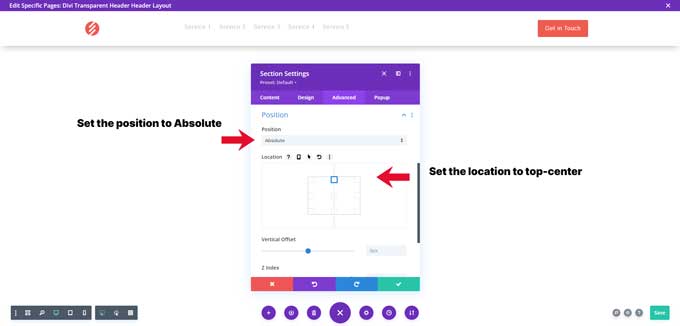
Step 2: Give the section Position Absolute
Open the section and go to the Advanced tab, under position set it to Absolute, and choose the Location top center.
How to make a transparent header sticky on scroll
With the previous method, the transparent header stayed static but if you want to make it sticky then you can follow these steps.
Step 1: Make the section and menu background transparent
Make the header section background transparent and also make the background of the menu transparent. See step 1 of the previous chapter for images.
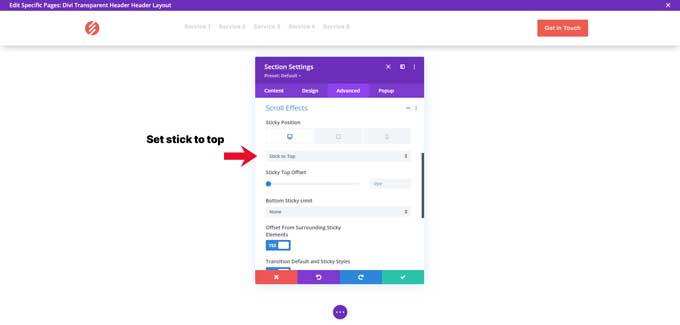
Step 2: Make the header section sticky
Open your header section and go to the Advanced tab, under Scroll Effects set Stick to Top. For tablet and mobile set this to Do Not Stick.
Step 3: Add the CSS code
Add the following CSS code in Divi > Theme Options > CSS or in your Divi child theme if you are using any.
@media screen and (min-width: 981px) {
.et-l--header {
margin-bottom: -70px;
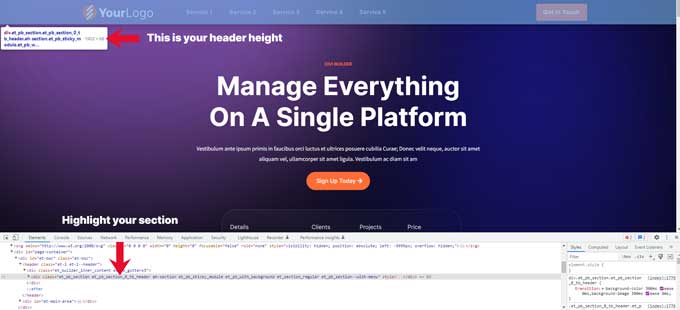
}}The value -70px is the height of your header section. You have to adjust this value to the height of your header.
The easiest way to find this height is through the inspector tool.
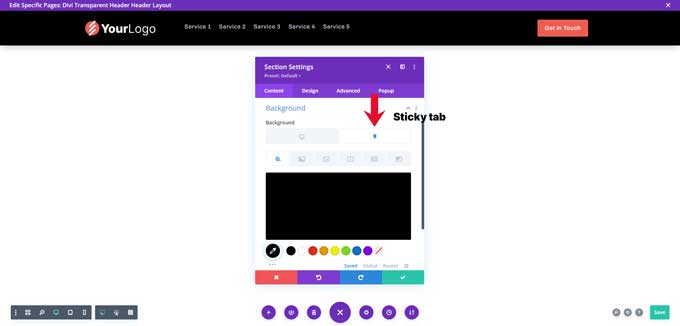
Step 4: Change the header background color
When you scroll down the page you likely want to give the transparent header a background color. To do this open your header section and go to the background, switch to Sticky tab and here you can change the background color.
To learn more about sticky headers you can follow this tutorial “How to Create a Sticky Header in Divi“.
How to make a transparent header in the default Divi menu
If you are using the default Divi menu and want to make it a transparent menu then follow these steps.
In your WordPress Dashboard navigate to Divi > Theme Customizer > Header & Navigation > Primary Menu Bar > Background Color.
Set the transparency tab to 0.
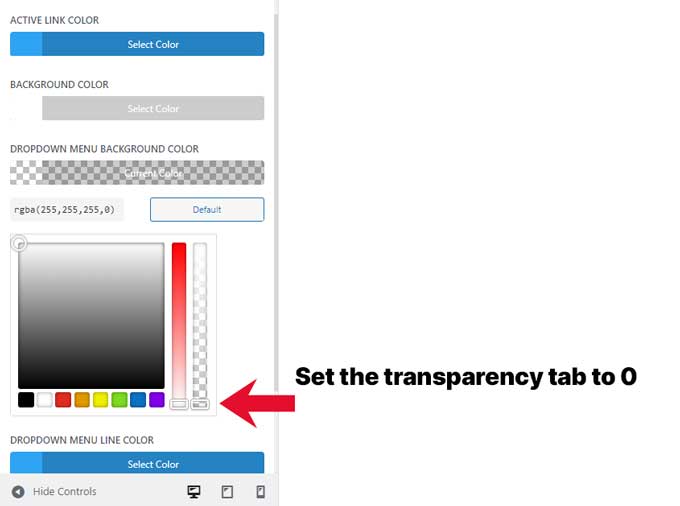
You will now have a transparent Divi header.
To change the transparent background on scroll you can use the background color option in Divi > Theme Customizer > Header & Navigation > Fixed Navigation Settings > Primary Menu Background Color.
Conclusion
In conclusion, creating a transparent header in Divi is simple and easy to do. Whether you’re using the default Divi menu or have created a custom global header, there are solutions that can save you time and energy.
By following the step-by-step instructions outlined in this tutorial, you’ll be able to create a transparent header for your Divi website in under 5 minutes.
If you have any questions please let me know in the comments below.

This is absolutely amazing. Straight to the point and quite easy to follow. Thank you Mark, Lee doing your thing