


It is very important to have high-quality content on the internet. Search engines want to give people reliable and helpful information. It is our responsibility to make sure our websites meet these standards.
A ‘Divi table of contents‘ helps structure the content in an organized way that makes it easy for people to find and use.
In this guide, you can learn how to add a Divi table of contents so your website meets search engine standards and is easy for everyone to use.
I will provide you with two popular options for creating a table of contents. The first option is a free plugin and the second one is a premium Divi plugin with additional features.
With both options, you can create a table of contents on any post or page of your Divi website. You can also create a table of contents for the sidebar.
I will give you an overview and comparison of each plugin so that you can choose which one to use.
Table of Contents
Why Should You Use a Table of Contents?
Using a Table of Contents (ToC) in your blog post offers several benefits, both for the reader and for the content creator. Here are some reasons why you should consider including a ToC in your blog post:
- Improved User Experience: A ToC provides readers with an overview of the content, allowing them to quickly navigate to sections that interest them the most. This can be especially useful for long-form articles.
- Enhanced SEO: Search engines, like Google, sometimes use the ToC to generate “jump links” in the search results, allowing users to jump directly to a specific section of the page. This can increase the click-through rate from search results.
- Increased Time on Page: By making it easier for readers to find and navigate to relevant sections, they are more likely to spend more time on your page, which can be a positive signal for search engine rankings.
- Professional Appearance: A well-organized ToC can make your post look more professional and structured. It gives the impression that the content is well-researched and thoughtfully presented.
- Easier Updates: If you ever need to update or revise your blog post, having a ToC can make it easier to locate and modify specific sections.
- Accessibility: For readers using screen readers or other assistive technologies, a ToC can make it easier to understand the structure of the content and navigate through it.
- Encourages Comprehensive Coverage: When creating a ToC, you might realize that there are topics or subtopics you’ve missed. This can prompt you to provide a more comprehensive coverage of the subject.
- Reduces Bounce Rate: If readers can quickly find what they’re looking for through a ToC, they’re less likely to leave the page prematurely, reducing the bounce rate.
- Bookmarking: Readers can easily bookmark specific sections for future reference, especially if the ToC links are anchor-linked.
- Shareability: If readers find a specific section particularly useful, they might share that specific part with others, increasing the reach of your content.
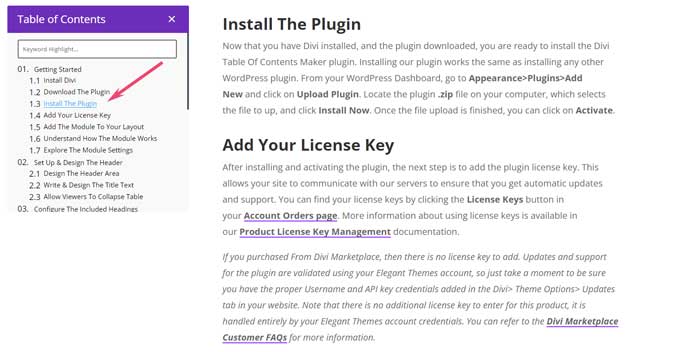
Here is an example of how a table of contents can look for your SERP (Search Engine Results Page).
This SERP is from my blog post about the Best Divi Child Themes. In the image below, you can see some of the headings from the table of contents in the snippet.
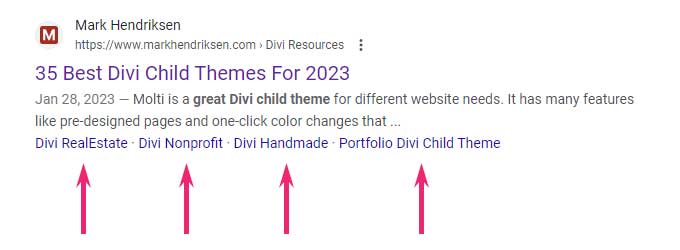
You can click on those heading links and it will jump right to that section of the page.
How to Create a Table of Contents for Divi With a Free Plugin
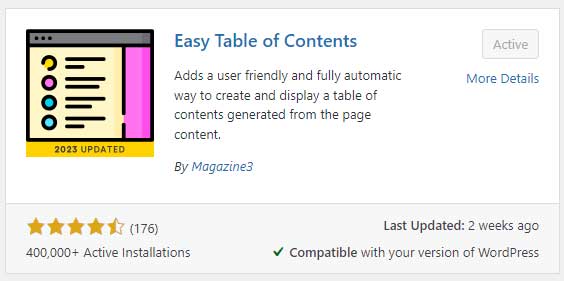
The Easy Table of Contents by Magazine3 is a WordPress plugin that offers a user-friendly and automatic way to create and display a table of contents generated from the page’s content.
Key Features
- Easy Table of Contents is a WordPress plugin that simplifies the creation and display of a table of contents on posts, pages, and custom post types.
- Features of the plugin include automatic table of contents generation, support for the <!–nextpage–> tag, compatibility with various page editors (Classic Editor, Gutenberg, Divi, Elementor, WPBakery Page Builder, and Visual Composer), and the ability to customize the appearance of the table of contents.
- Users can choose from multiple counter bullet formats (none, decimal, numeric, roman), display the table of contents hierarchically or not, and optionally hide it with full control.
- The plugin supports smooth scrolling and allows selective enabling or disabling of the table of contents on a post-by-post basis.
- Users can also choose which headings are used to generate the table of contents and exclude headers globally or on a per-post basis.
- A widget is available for placing the table of contents in the theme’s sidebar, with an option for it to be affixed or stuck on the page while scrolling.
- The widget highlights the sections currently visible on the page, and the highlight color is configurable (Pro version only).
Reviews for Easy Table Of Contents
The majority of the reviews on WordPress.org are 5-star reviews with an average of 4.3 out of 5 stars.

Pros and Cons
Pros
- Free Version: This plugin comes with a free version
- User-Friendly: It offers a user-friendly way to insert a table of contents into posts, pages, and custom post types.
- Automatic Generation: Automatically generates a table of contents by parsing the content for headers.
- Compatibility: Works with various editors including Classic Editor, Gutenberg, Divi, Elementor, WPBakery Page Builder, and Visual Composer.
- Customization: Provides numerous options to configure the appearance, including themes, bullet formats, and hierarchical display.
- Hide/Show Option: Users can optionally hide or show the table of contents.
- Smooth Scrolling: Supports smooth scrolling for a better user experience.
- Selective Enablement: Allows selective enablement or disablement on a post-by-post basis.
- Widget Support: If not inserted in the post content, a widget can be used to place the table of contents in the theme’s sidebar. This widget can be affixed or stuck on the page for visibility as users scroll.
- Developer-Friendly: Offers many action hooks and filters for developers.
Cons
- Pro Features: If you want special features like highlighting headings while scrolling, you need to get the pro version of the plugin.
- Price: The pro version of the product starts at $49 for one license. That might be expensive for some people.
Product Details
- Free version
- The premium version starts from $49
Step-by-Step Guide on How to Setup the Easy Table of Contents Plugin
In this section, I will be creating a ToC with the free version of the Easy Table of Contents plugin.
After the installation process, I will describe how to set up this plugin for your Divi website.
At the end of this section, you will find some advanced styling options for your ToC.
Step 1: Installing Plugin
In your WordPress dashboard navigate to Plugins > Add New and search for the plugin Easy Table of Contents.
Install and activate this plugin.
This ToC plugin will make a table of contents from the headings on your post or page.
Step 2: Setup the ToC
Placement Options
Now that the plugin is installed let’s start with the placement options.
Go to Settings > Table of Contents.
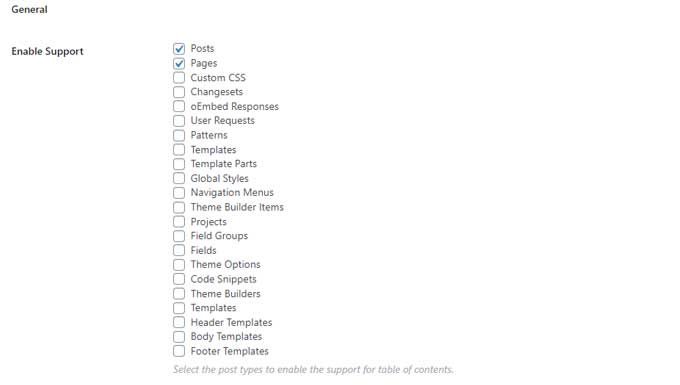
Enable Support
Under Enable Support you can choose where the table of contents should be displayed. By default Pages and Posts are enabled.
If you only want to use table of contents on Posts then you can deselect Pages from this list.
Auto Insert
With auto insert, you can choose if your table of contents will be automatically added to your content.
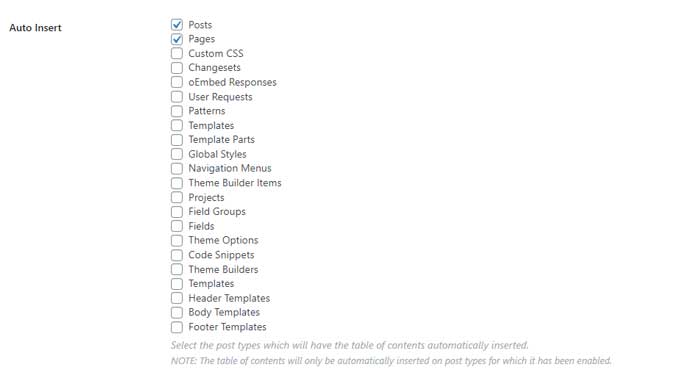
You can also deselect all of these and decide on the post if you want to add a table of contents.
At the bottom of a post, you can find a list of content options that are just for that post. You can turn it on so that people who read the post will see the table of contents.
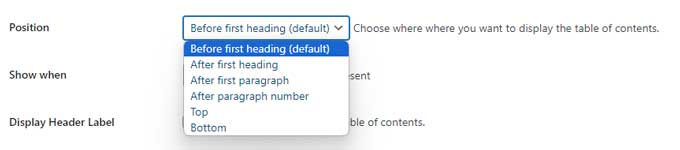
Position
Under Position, you can choose where you want the table of contents to be displayed on your post.
You can choose between the options:
- Before first heading
- After first heading
- After first paragraph
- After paragraph number
- Top
- Bottom
When you have set this up you will have a table of contents on your page.
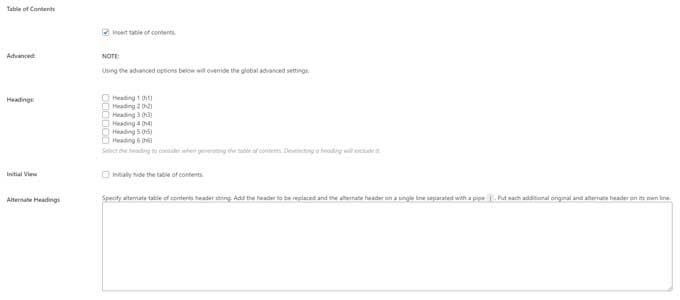
Advanced Styles for Your Table of Contents
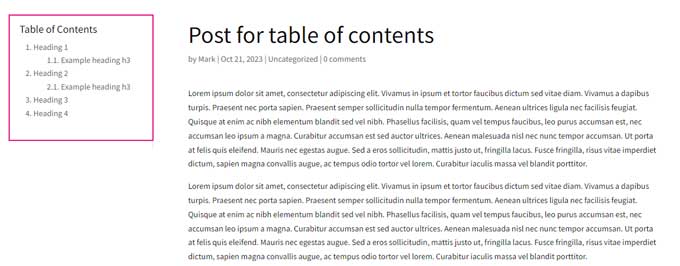
If you want to make your table of contents more attractive, you could create something like this.

To make a table of contents look like this one, do the following steps.
Step 1: Import the settings
Start by downloading this folder.
Download settings folderAfter downloading this folder “easy-toc-advanced-settings.zip” unpack this folder. Inside you will find the JSON file “easy-toc-advanced-settings.json”
In your WordPress dashboard navigate to Settings > Table of Contents.
Scroll to the bottom (Import/Export Settings) and click on Choose file.
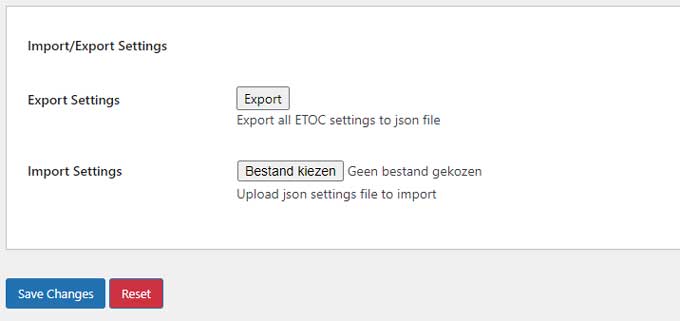
Now locate your downloaded JSON file and start the import process.
Step 2: CSS Code
Copy the following CSS code and paste this in Divi > Theme Options > CSS
Note: if you have a Divi child theme then you can place this CSS code in your style.css file.
/* Table of Contents */
.ez-toc-custom {
	padding: 25px 50px 25px 50px !important;
}

.ez-toc-custom  p.ez-toc-title {
	font-weight: 600 !important;
        font-size: 24px !important;
	color: #25374e !important;
	margin-bottom: 15px !important;
	display: block !important;
}

.ez-toc-custom ul li a {
	font-size: 19px;
	font-weight: 500;
}

.ez-toc-custom ul li  {
	margin-bottom: 3px !important;
        margin-top: 3px !important;
}

.ez-toc-counter nav ul li a::before {
        margin-right: 0.6em;
	font-size: 18px;
	font-weight: 700;
	line-height: 1.7em;
	color: #25374e;
}
How to Create a Table of Contents in Your Sidebar
Go to Appearance > Widgets and place a new widget in your sidebar. You can also create a new sidebar for your post page at the bottom.
The plugin comes with 2 widgets a normal table of contents widget and a sticky one.
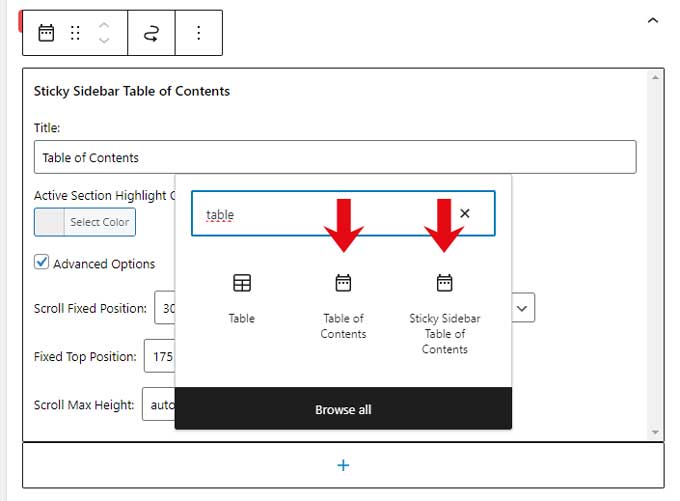
Choose the widget you like to use.
Now, you need to create a post template in the Theme Builder.
Go to Divi > Theme Builder and create a new template, assign this template to your posts.
After that create your post template.
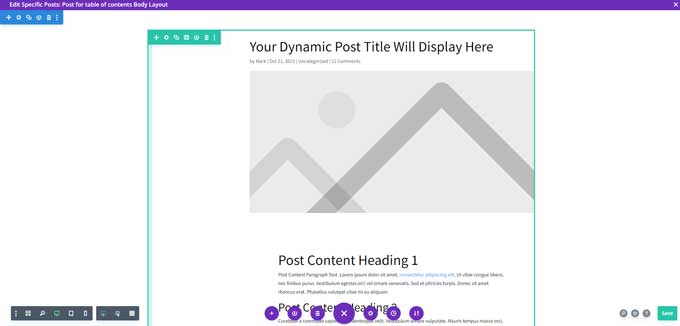
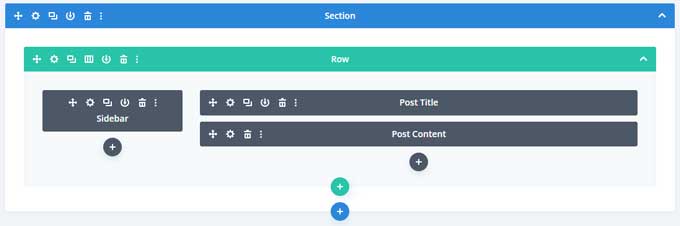
For this example, I create a 1/4 – 3/4 column and place a Post Title and Post contents module in the 3/4 column.
In the 1/4 column, I place a sidebar module don’t forget to assign your sidebar to this module.
In your sidebar, you should now have a table of contents.
The Divi Table Of Contents Maker Plugin

The Divi Table Of Contents Maker by Pee-Aye Creative is a plugin in which you have full control over any element of your table of contents this will allow you to enhance your blog post navigation.
With this user-friendly table of contents plugin, you will get access to a new module in the Divi Builder.
You can design your content of tables from within the Divi Visual Builder.
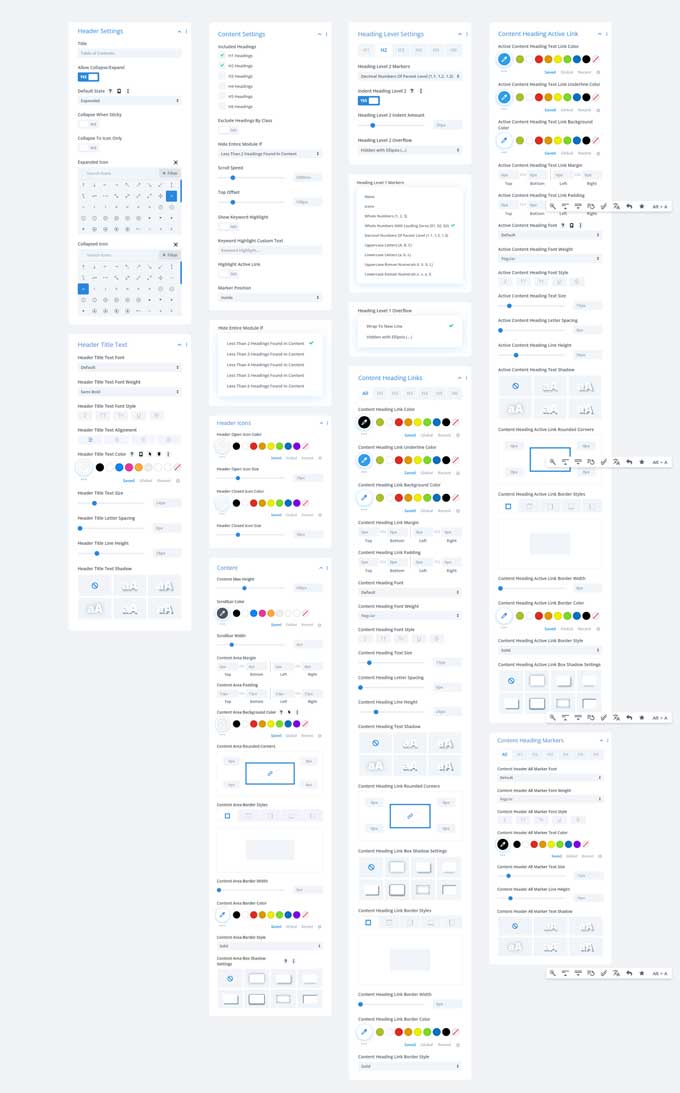
This plugin allows you to make a list of the topics in your sidebar. When you scroll through the content, it will show which topic you are currently reading. This helps you stay organized while reading.
Features of Divi Table Of Contents Maker
- Custom Title Text: Write a title for the table of contents.
- Collapsible Table: You can decide to keep a table open or collapse it. You can choose the default state, pick icons, and make different options for each device.
- Auto Collapse When Sticky: When the table of contents is set to sticky on the top of the page as you scroll, it should close itself automatically.
- Sticky Settings: Use the “Stick To Top” setting when you scroll so that the table of contents stays in view.
- Marker Prefixes: You can choose from a lot of different symbols to use before each heading level. This includes things like regular numbers, parent-level decimal numbers, upper and lowercase letters, and both uppercase and lowercase Roman numerals.
- Custom Icon Markers: You can add a special icon from Divi or Font Awesome before the headings.
- Include H1-H6 Headings: Decide which headings will be included in the list of contents.
- Indent Options: You can choose to move each heading a certain number of spaces away from the text.
- Smooth Scrolling: If you click on the links in the table of contents, it will take you to that spot on the page. The movement will be smooth and easy.
- Scroll Speed: Set a limit on the amount of time it takes for a heading to appear after clicking on a link.
- Link Styling: For each heading, choose colors, spacing, shadows, and borders to make the links look good.
- Hover Effects: The links in the Table of Contents have a cool animation when you move your mouse over them.
- Hierarchical View: You can quickly understand how the post titles are organized.
- Keyword Highlight: You can search for any word in a post and make it stand out by changing the color of the text.
- Vertical Offset: Set the distance from the top of your browser to the title of the page you are linking to.
- Word Wrap Options: If the headings for your table of contents (TOC) are too long, you can either split them into two lines or shorten them using ellipses.
- Exclude Content By Class: When you want to leave headings out of the table of contents, you can add a CSS class to any section, row, or module.
- Content Height: Set a limit on how high the content area can be. Add a scrollbar so that you can see more headings if needed.
- Design Settings: You can make the TOC look however you want by customizing it using all the available design settings.
- Conditional Hiding: If the amount of headings in a post is lower than what was selected, then hide the whole module.
- Theme Builder Support: Divi Theme Builder templates make it easier to use the module. This will automatically add content headings for each post.
- Rankmath Integration: The module is connected to the Rankmath SEO plugin content analysis. This means that it works with the plugin and can help you analyze your content.
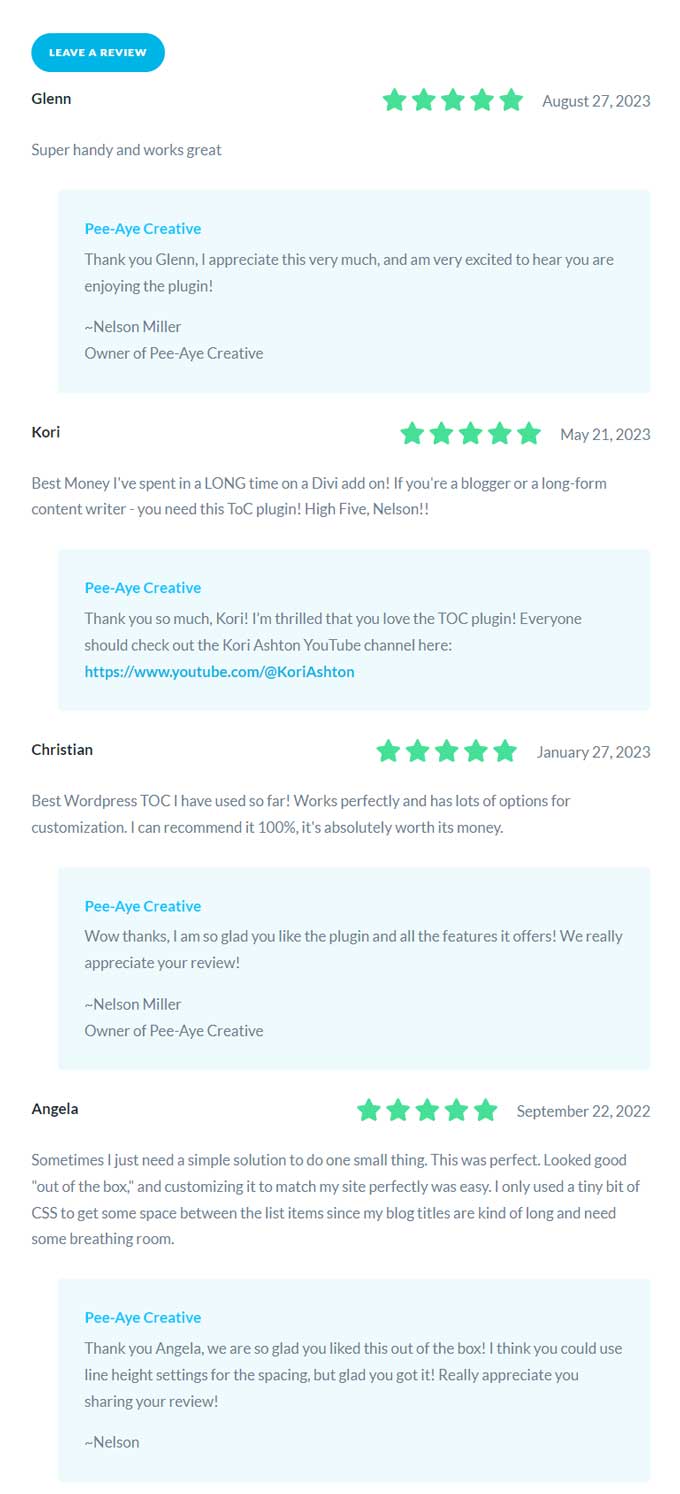
Reviews for Divi Table Of Contents Maker
This plugin comes with some good 5-star reviews.
Pros and Cons
Pros
- Comprehensive Customization: The module offers a wide range of customization settings and design styling options, allowing users to tailor the table of contents to their preferences.
- Support and Documentation: Pee-Aye Creative is known for its dedicated support and comprehensive documentation, ensuring users have the resources they need.
Cons
- Cost: There’s an associated cost with the module, and users need to evaluate if the benefits justify the investment.
- Specific to Divi: The module is designed specifically for the Divi Theme/Builder by Elegant Themes, which means it might not be suitable for those using other WordPress themes or builders.
Product Details
- Available in the Divi Marketplace for $15.
- Unlimited website usage.
- 1 year of support and updates.
- 30-day money-back guarantee.
Table of Contents Comparison
I will give you an overview of both plugins Easy Table of Contents and Divi Table Of Contents Maker.
| Feature | Easy Table of Contents | Divi Table Of Contents Maker |
|---|---|---|
| Price | Free (Pro version available) | $15 for unlimited website usage |
| Automatic Generation | Yes | Yes |
| Compatibility | Classic Editor, Gutenberg, Divi, Elementor, WPBakery Page Builder, Visual Composer | Specifically for Divi |
| Collapsible Table | Yes | Yes |
| Sticky Settings | Yes | Yes |
| Smooth Scrolling | Yes | Yes |
| Hierarchical View | Yes | Yes |
| SEO Integration | Supports Rank Math | Supports Rank Math |
| Customization Options | Multiple themes, counter bullet formats, and color customizations | Extensive customizations |
| Widget Support | Yes | Yes |
| Rating | Majority 5 stars | 5 stars based on user reviews |
- Ease of Use: Both plugins aim to be user-friendly, but the Easy Table of Contents plugin seems to have a broader compatibility range with various page editors.
- Customization: While both plugins offer extensive customization options, the Divi Table Of Contents Maker is specifically tailored for Divi users and offers features integrated with the Divi builder.
- Price: The Easy Table of Contents plugin is available for free on WordPress.org, with a pro version offering additional features. On the other hand, the Divi Table Of Contents Maker is priced at $15 for unlimited website usage.
- Ratings & Reviews: Both plugins have received positive feedback from users, with a majority of users giving them 5-star ratings.
What is the Best Table of Contents Plugin to Use with Divi?
In conclusion, having a great Divi table of contents is vital for your website. It helps the search engine index the content and makes it easier for people to access the information they need.
You have two options when implementing a Table of Contents in Divi, either use a free plugin or invest in the premium plugin that offers additional features.
Each option has its own advantages and I have offered an overview and comparison of both to help you decide which one is best for your website.
If you are a Divi user and willing to spend $15 then Divi Table of Contents Maker is a great choice.
