


In this tutorial, I’ll teach you how to create a reveal image effect. This can add visual interest to your Divi website.
A reveal image effect is a web design technique that gradually exposes an image through animation or transition.
Table of Contents
Preview of the end result
Before we start I will show you the end result.

I have created this effect on my Atlas Divi child theme.
As you scroll down the demo page you will see several reveal images.
How to create a reveal image effect
Creating this effect is quite simple and doesn’t require any plugins or code. You can achieve it using just the Divi Builder settings.
Step 1: The layout
We start by creating the layout.
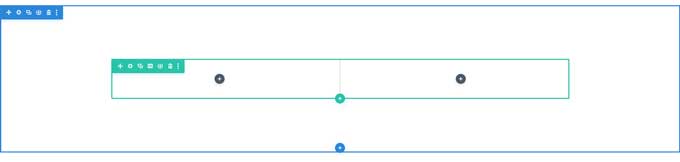
Place a section and a 2-column row on any page.
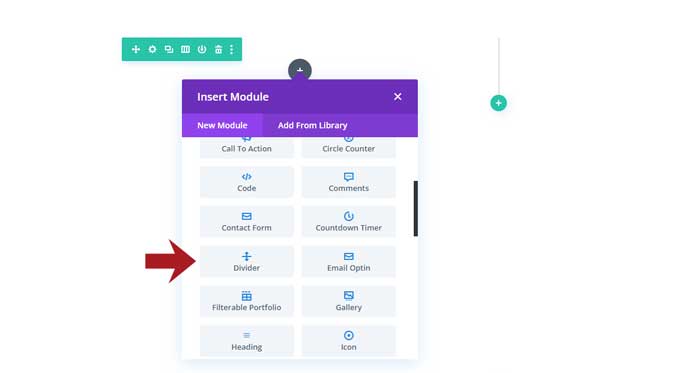
Step 2: Place a divider module
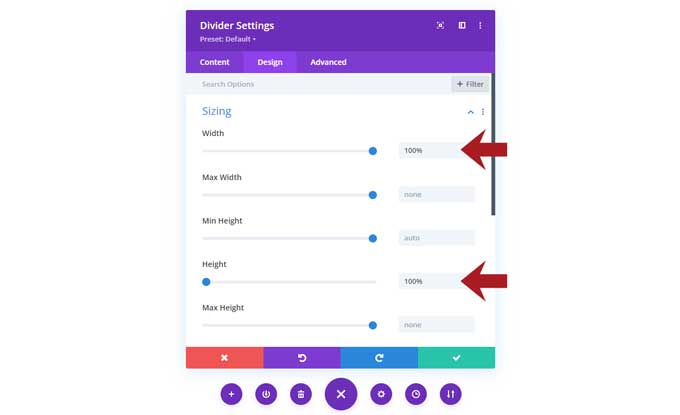
Place a Divider module in the first column.
Then use the following settings for this module:
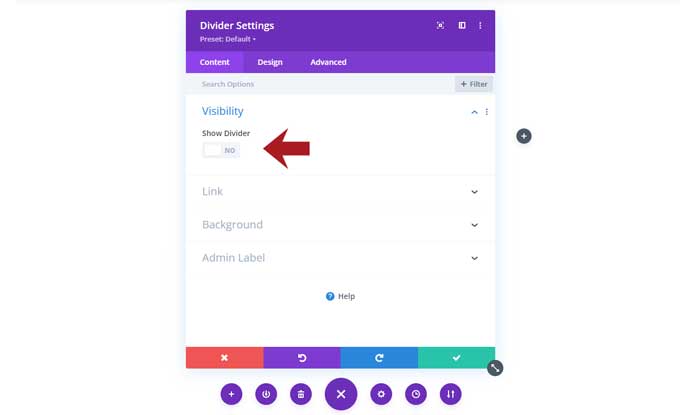
Content tab
Visibility
- Disable Show Divider
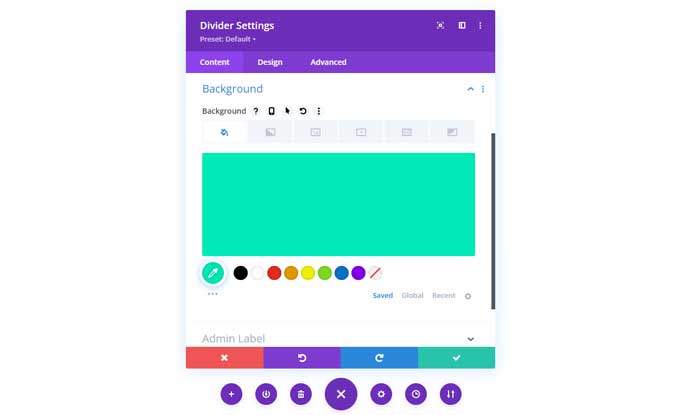
Background: choose a background color.
Design tab
Use the following settings in the Design tab.
Sizing:
- Width: 100%
- Height 100%
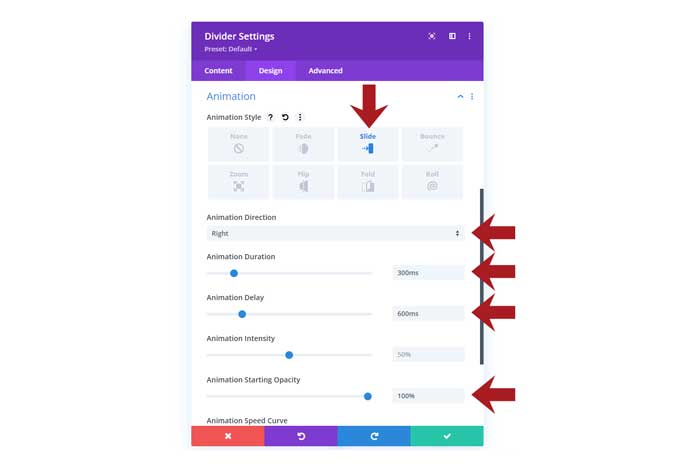
Animation:
- Animation Style: Slide
- Animation Direction: Right
- Animation Duration: 300ms
- Animation Delay: 600ms
- Animation Starting Opacity: 100%
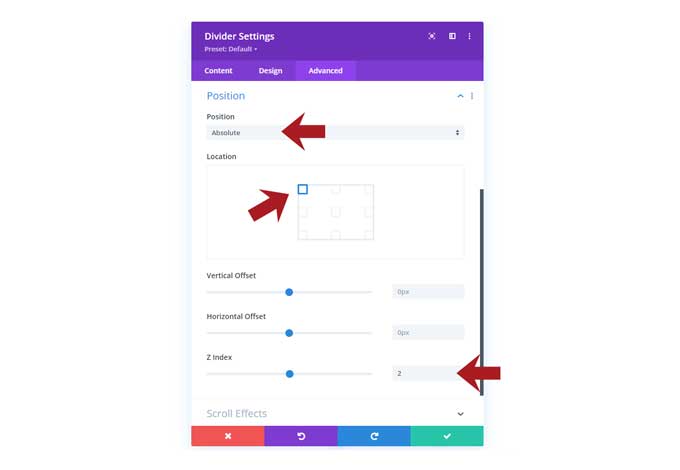
Advanced tab
Go to the Advanced tab and use the following settings:
Position:
- Position: Absolute
- Location: Left top
- Z-index: 2
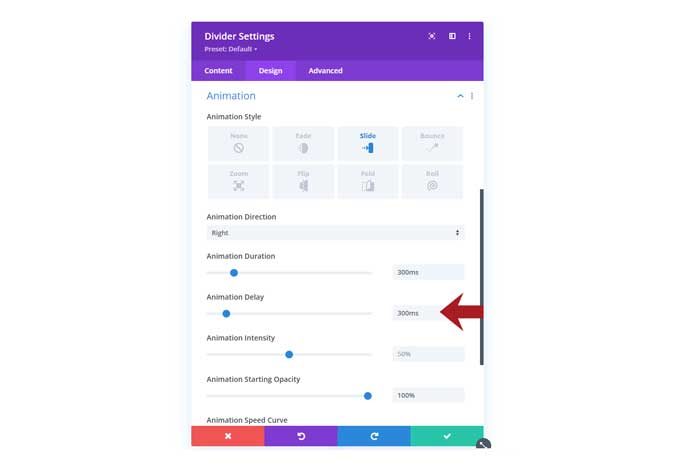
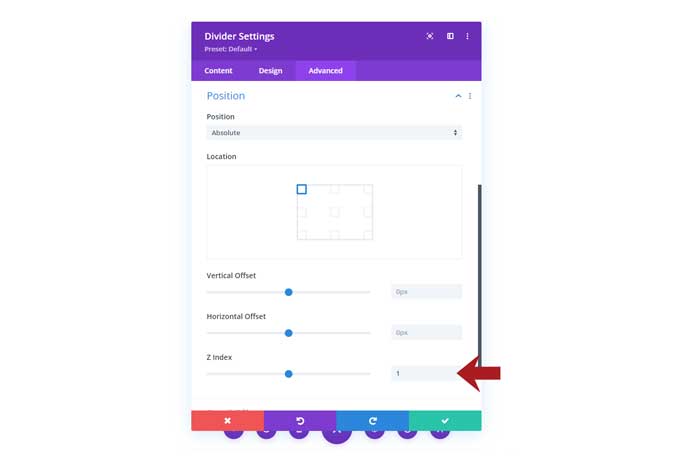
Step 3: Second divider
Now duplicate the first divider and adjust the following settings:
Content tab
Choose a different background color
Design tab
Animation: Change the animation delay from 600ms to 300ms
Advanced tab
Position: Change the z-index value to 1.
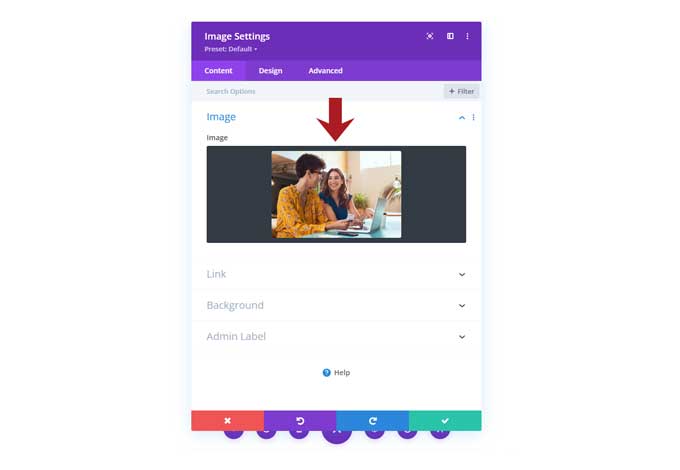
Step 4: Place an image module
Place an image module under the Dividers.
Note: If you have trouble selecting or rearranging the divider modules, switch to Wireframe View (bottom left icon).
This is the layout order:

I renamed the Divider modules to “slide green” and “slide black” to clearly distinguish between them.
Content tab
Image: Add an image.
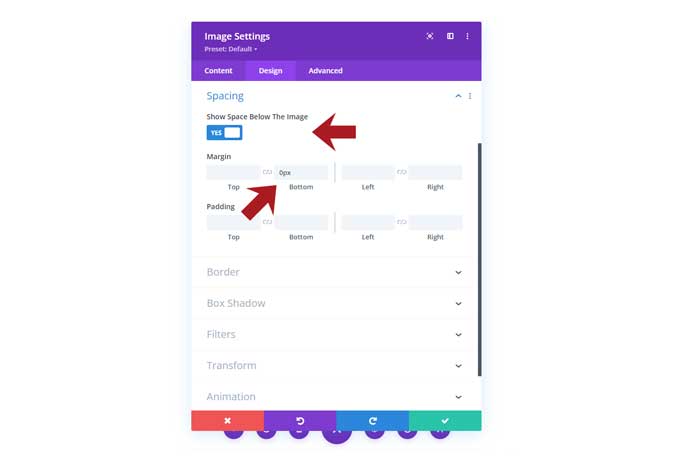
Design tab
Spacing
- Enable Show Space Below The Image
- Margin bottom: 0px
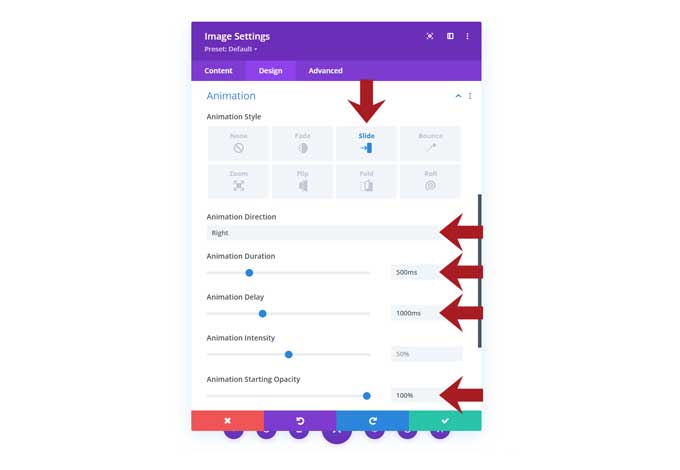
Animation:
- Animation Style: Slide
- Animation Direction: Right
- Animation Duration: 500ms
- Animation Delay: 1000ms
- Animation Starting Opacity: 100%
And that’s it you have now created a reveal image effect for Divi.
Conclusion
In this tutorial, you learned how to create a reveal image effect in Divi using just the Divi Builder settings. With this technique, you can add creative and eye-catching effects to your website without any coding knowledge. Experiment with different background images and animation styles to create unique reveal image effects for your Divi website.
If you have any questions please let me know in the comments below.

This is great! I’ll be using this in my upcoming project, it’s perfect for the concept I’m envisioning. Thanks for the great tutorials!