



























Looking for a free Divi 5 WooCommerce layout pack to kick-start your next online store? Sundaze is a modern eCommerce layout pack designed for fashion, clothing, and lifestyle websites.
The pack includes the essential pages and WooCommerce templates you need to build a complete store with Divi 5. You can use the layouts as they are, or customize the colors, typography, images, products, and sections to create your own unique design.
Sundaze is completely free to download. In this tutorial, I’ll show you how to install the layout pack, import the Divi settings and templates, configure the shop filters, and set up the free DrawerCart Lite plugin used in the demo.
What’s included in the Sundaze layout pack?
Sundaze gives you a complete starting point for building a modern WooCommerce store with Divi 5. The pack includes layouts for your main website pages as well as custom WooCommerce templates.
- Home page – A complete eCommerce homepage with product, promotional, blog, and lifestyle sections.
- Shop page – A custom WooCommerce shop design with an off-canvas product filtering system.
- Product page – A custom product template for displaying your products with Divi 5 and WooCommerce.
- About page – A lifestyle-focused page for introducing your brand and telling your story.
- Blog – Blog layouts that match the overall Sundaze design.
- Contact page – A clean contact page that you can easily customize with your own information.
- Headers and WooCommerce templates – Imported through the Divi Theme Builder so the design carries across your store.
- DrawerCart Lite integration – The demo uses my free DrawerCart Lite plugin for the slide-out shopping cart and free-shipping progress reward.
Everything is fully customizable with Divi 5, so Sundaze can be used as a starting point for many different types of WooCommerce stores—not just fashion websites.
How to install the Sundaze Divi 5 layout pack
Before you start: make sure Divi 5 and WooCommerce are installed and activated on your website.
Step 1: Download the layout pack
Log in to your account, or create a free account here: https://www.markhendriksen.com/member-area/
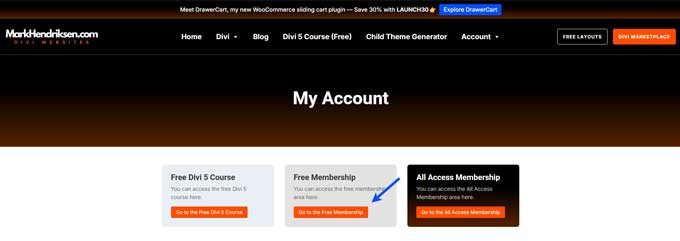
After logging in, go to the Free Membership area.
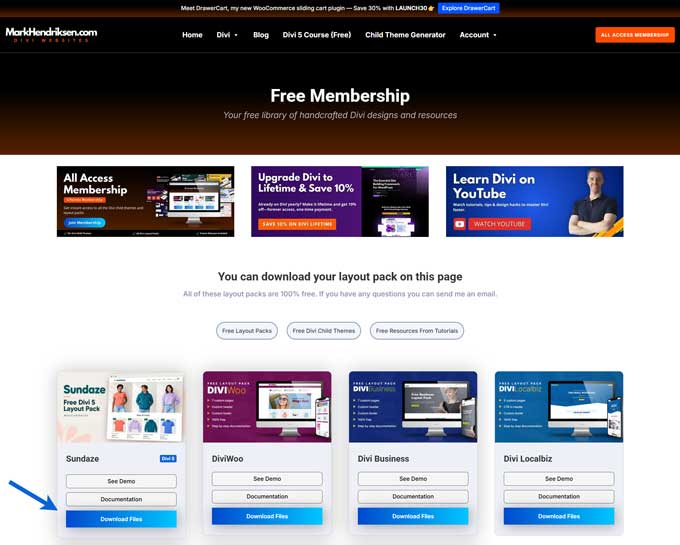
From here, find Sundaze and download the layout pack files.
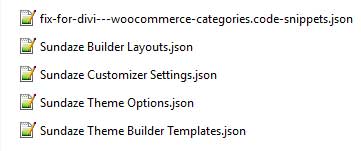
Unzip the downloaded folder. Inside, you will find the files needed to import the Sundaze design and settings.
Step 2: Import the layout pack
I recommend installing Sundaze on a new website. Some of the files below import Divi settings and templates, which may overwrite settings you already have on an existing website.
- Go to Divi > Theme Options and click the import/export icon (the up/down arrows).
Select Import and upload Sundaze Theme Options.json.
- Go to Divi > Theme Builder and click the import/export icon.
Select Import and upload Sundaze Theme Builder Templates.json.
- Go to Divi > Theme Customizer and click the import/export icon (the up/down arrows).
Select Import and upload Sundaze Customizer Settings.json.
- Go to Divi > Divi Library and click the import/export icon.
Select Import and upload Sundaze Builder Layouts.json.
Important: each JSON file needs to be imported in the correct Divi location. Do not try to import all of the files through the Divi Library.
Step 3: Set up your pages
Now that the layouts have been imported, we can create the individual pages.
Go to Pages > Add Page.
Give your page a name, for example Home, and publish the page.
Next, click Use Divi Builder.
Inside the Visual Builder, click Add Layout and then choose Saved Layout.
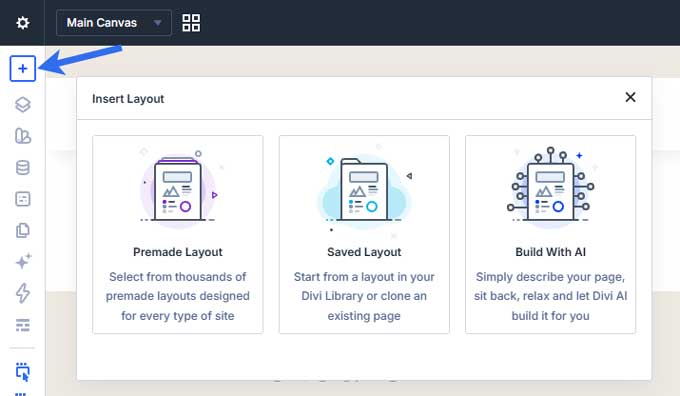
Select the Home layout to import it onto the page.
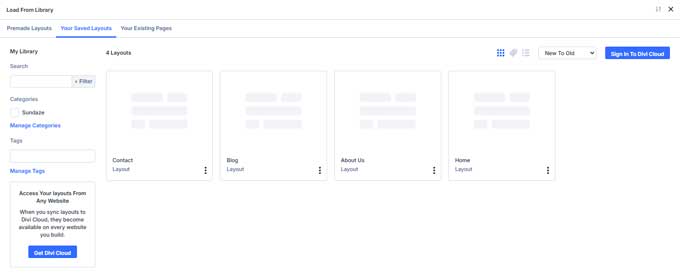
Repeat these steps for the other included pages, such as About Us, Blog, and Contact.
Create your menu
Go to Appearance > Menus and create a new menu. Add your pages to the menu and set it as your primary menu.
Set your home page
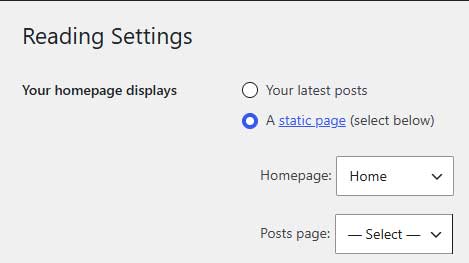
Go to Settings > Reading. Under Your homepage displays, select A static page and choose your newly created Home page as the homepage.
Add some products and blog posts
Add a few WooCommerce products to your store so the shop and product sections have content to display. I also recommend adding a few blog posts so the blog sections do not appear empty.
Step 4: Set up the shop filter
The Sundaze shop page includes an off-canvas filter area. To use it, we first need to create a widget area for the WooCommerce filters.
Go to Appearance > Widgets.
Scroll down and create a new widget area.
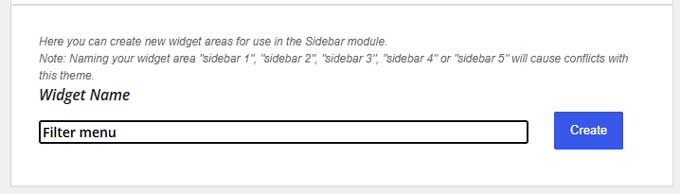
After creating the widget area, refresh the page. Your new widget area should now be available.
Add the WooCommerce product filters to this new sidebar.
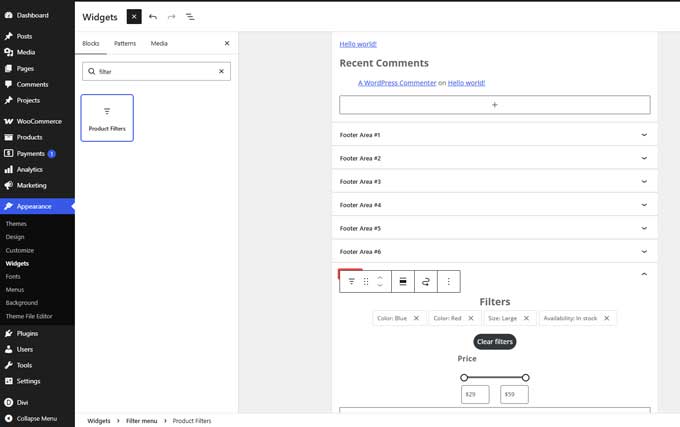
You can use the individual widget styling options to customize the appearance of the filters.
Below the product filters, I also added an H3 heading and the WooCommerce review widget.
For the review widget, I used the styling shown in the image below. Make sure you also add the following CSS class: sundaze-review-widget.
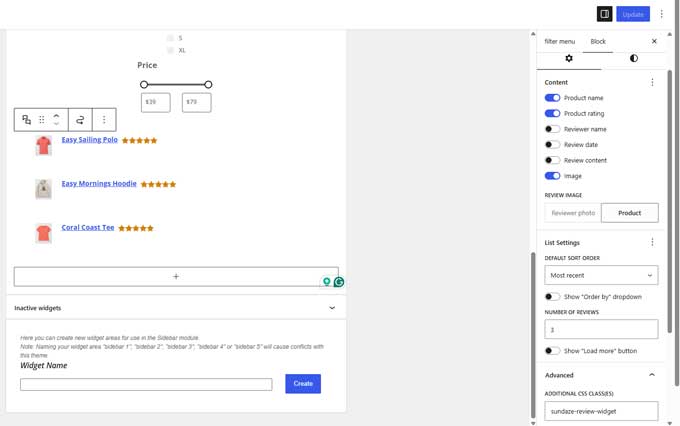
Once the sidebar is ready, we need to assign it to the Sundaze shop filter.
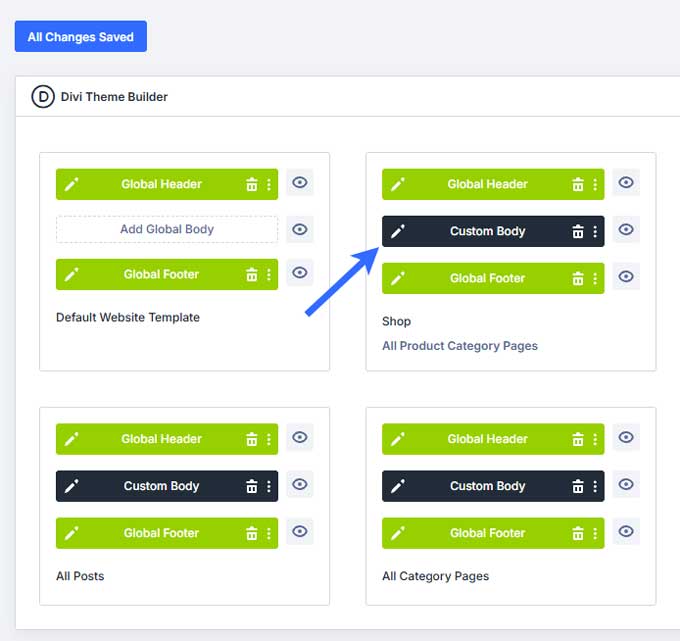
Go to Divi > Theme Builder and open the Shop template.
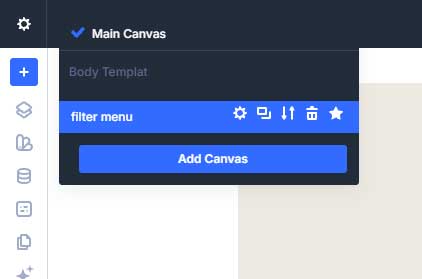
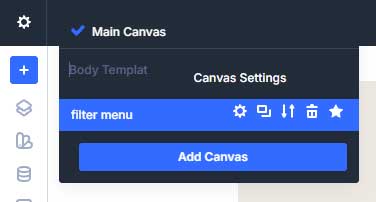
Open the Main Canvas and then open the Filter Menu Canvas.
The filter area may look empty because the sidebar is hidden by default. Switch to Wireframe View, open the Sidebar module, and under Widget Area select the filter widget area you created earlier.
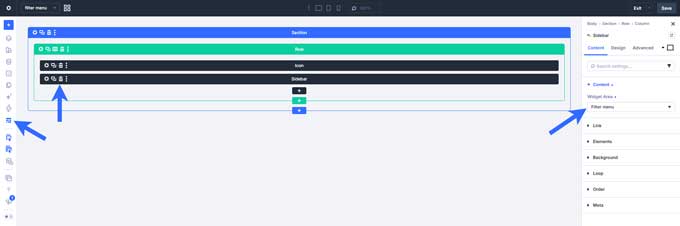
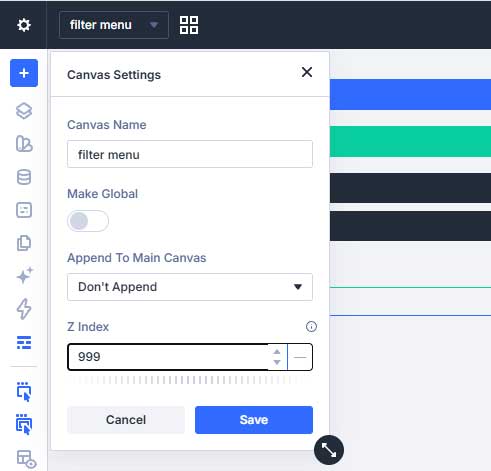
Next, go back to the Main Canvas and open the Filter Canvas settings.
Find the Z Index option and set it to 999. This makes sure the filter canvas appears above the rest of the page content.
Apply the Divi 5 product filter fix
The WooCommerce category product filter used in this layout does not currently work correctly with Divi 5. Fortunately, the Sundaze download includes a small fix.
To add the fix safely, we will use the free Code Snippets plugin.
Go to Plugins > Add Plugin and search for Code Snippets.
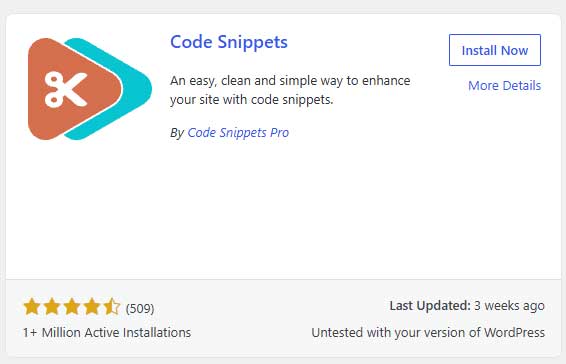
Install and activate the plugin.
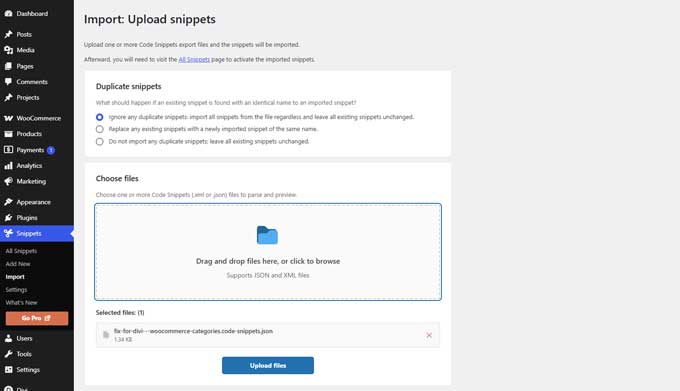
Next, go to Snippets > Import.
Import the fix-for-divi—woocommerce-categories.code-snippets.json file included with the Sundaze layout pack.
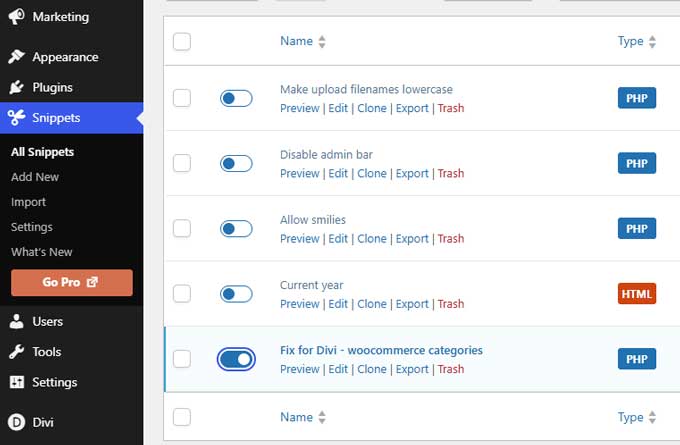
After importing the snippet, go to Snippets > All Snippets and activate the fix.
Step 5: Install DrawerCart Lite
The final step is to install DrawerCart Lite, the free WooCommerce cart drawer plugin I created and used in the Sundaze demo.
Go to Plugins > Add Plugin.
Search for StoreFlow DrawerCart for WooCommerce.
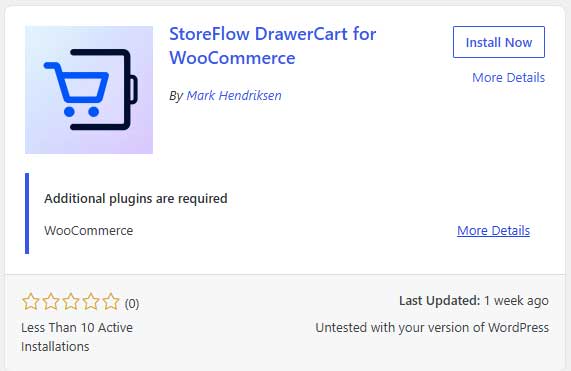
Install and activate the plugin.
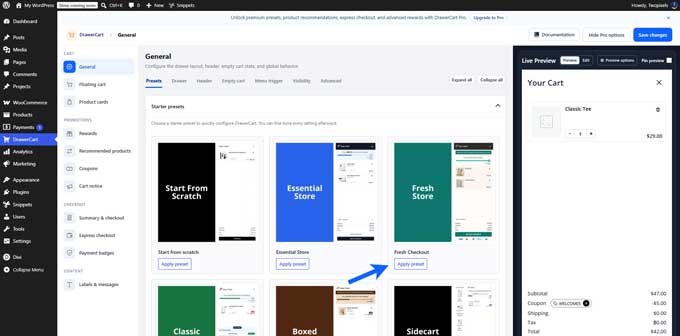
Go to DrawerCart and select the Fresh Checkout preset. This will give you a good starting point for matching the Sundaze demo.
Set up the menu cart trigger
Go to DrawerCart > General > Menu Trigger.
Copy the Menu Trigger ID.
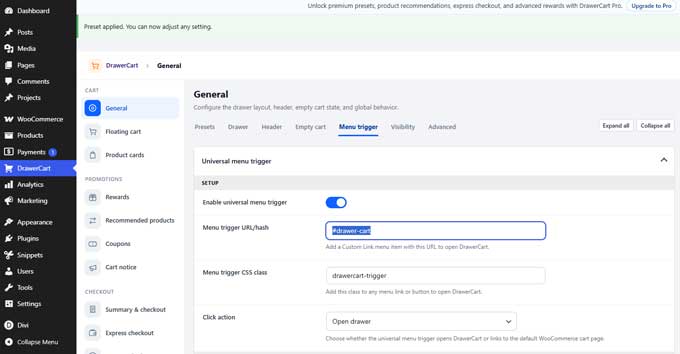
Next, go to Appearance > Menus.
Create a new Custom Link.
Enter Cart as the link text and paste the Menu Trigger ID into the URL field.
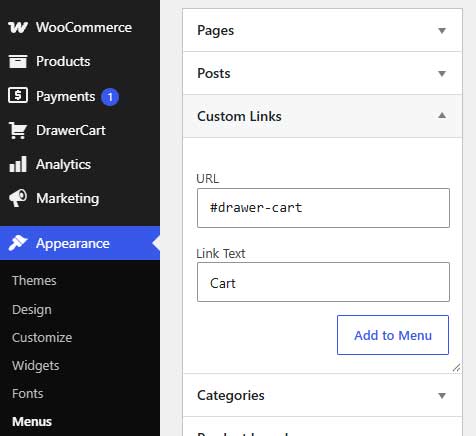
Add this new Cart item to your main menu and save the menu.
Now go back to DrawerCart > General > Menu Trigger.
To match the Sundaze demo, open the Display settings and disable Show Text.
Then configure the Count Badge using the settings shown below:
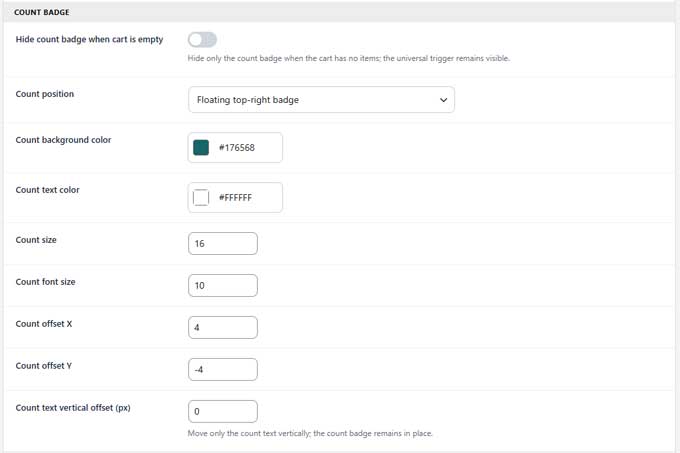
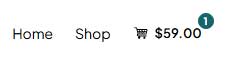
After these changes, your cart trigger should look similar to the Sundaze demo:
Set up the free shipping reward
The Sundaze demo also uses DrawerCart’s free shipping reward. Before configuring the reward in DrawerCart, we first need to set up free shipping in WooCommerce.
Go to WooCommerce > Settings > Shipping.
Add a shipping method and choose Flat Rate.
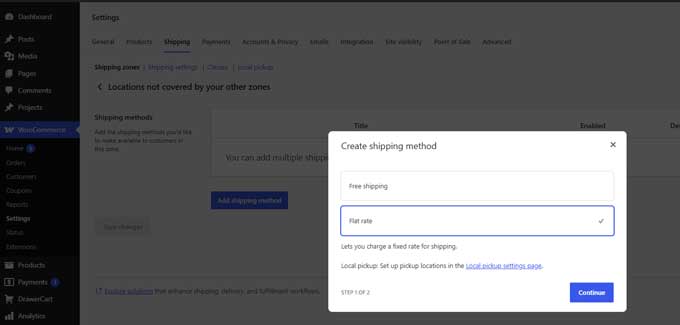
On the next screen, enter the regular shipping price you want to charge.
Then add another shipping method and choose Free Shipping.
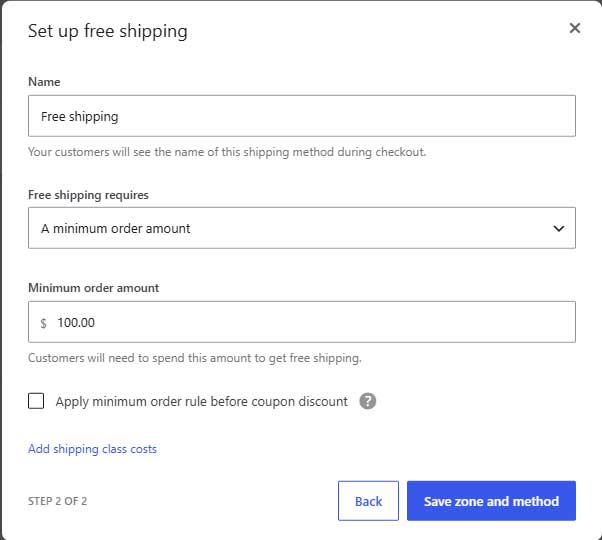
For the Sundaze demo, I set the minimum order amount for free shipping to $100.
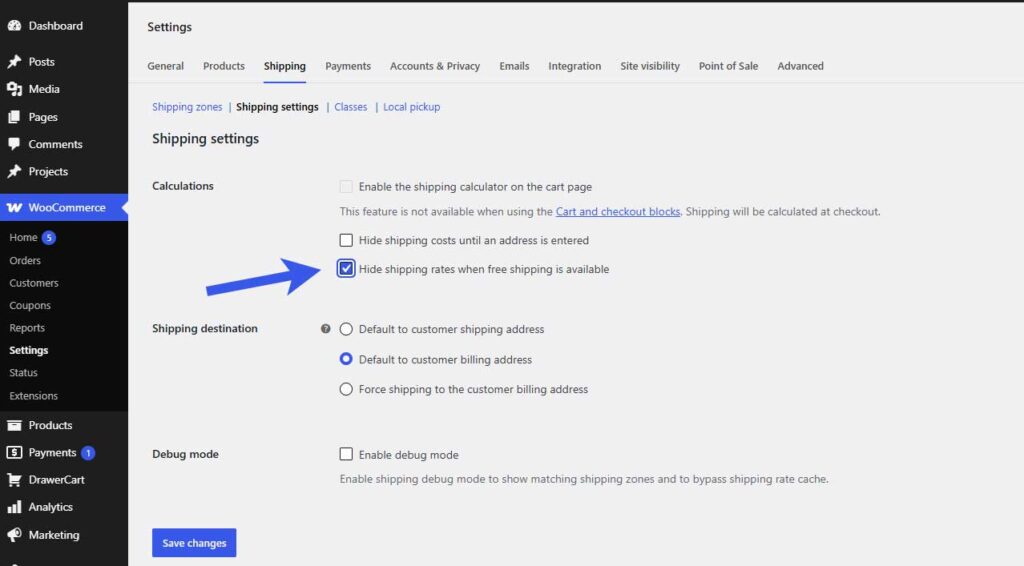
Go back to the WooCommerce shipping settings and enable Hide shipping rates when free shipping is available.
Now go to DrawerCart > Rewards > Milestone.
Set the reward threshold to the same amount as your WooCommerce free shipping minimum. In this example, that is $100.
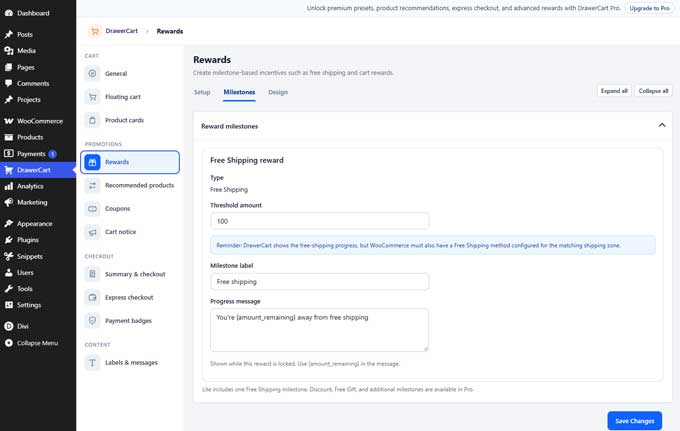
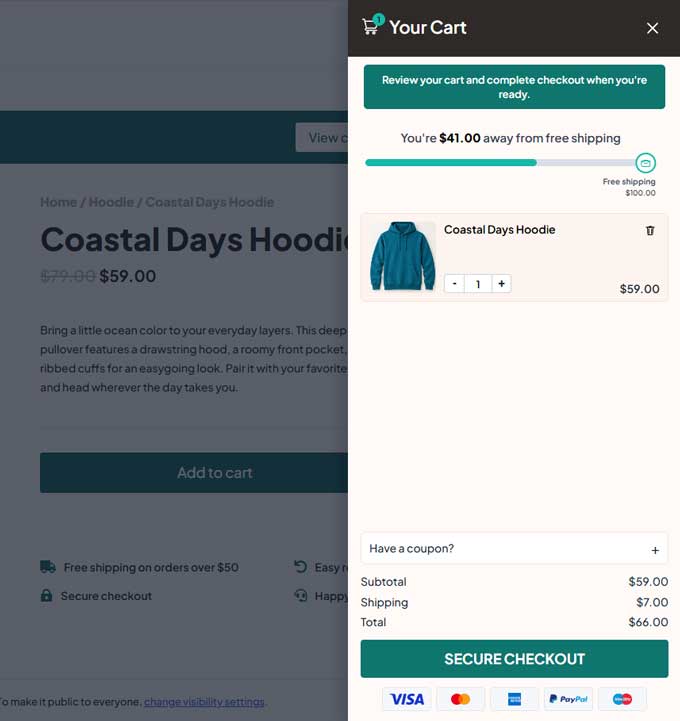
When the cart total is below the threshold, DrawerCart will show customers how much more they need to spend to unlock free shipping.
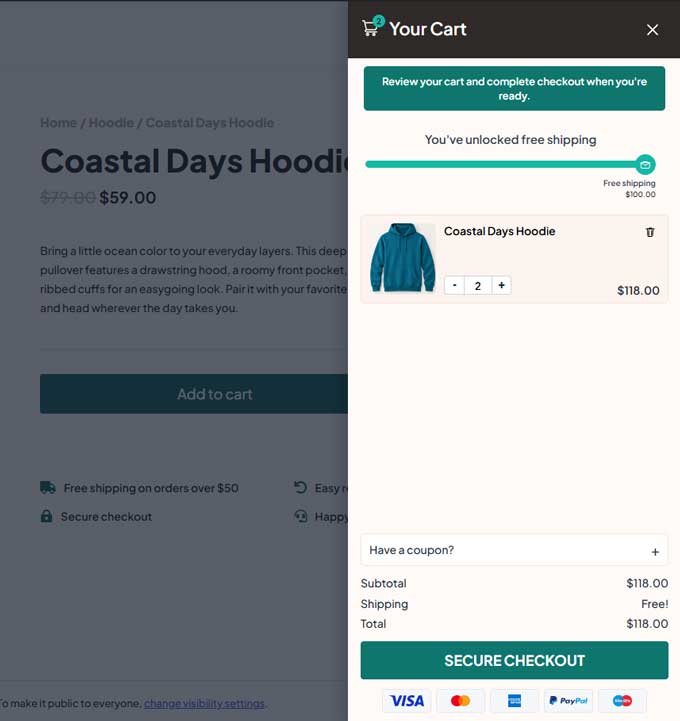
Once the threshold has been reached, the message changes to let the customer know that free shipping has been unlocked.
Sundaze is ready to customize
That’s it. Your Sundaze layout pack should now be installed, your pages and shop filters should be working, and DrawerCart Lite should be configured to match the demo.
From here, you can replace the demo content with your own products, images, colors, and branding and turn Sundaze into your own WooCommerce store.