























Making the same design change across multiple Divi modules can quickly become repetitive. Imagine you've created a page with six service cards, and now you want to change the background color, typography, or spacing of every button.
You could open each module individually and repeat the same changes. But there's a much faster way.
With Multi-Select and Bulk Editing in Divi 5, you can select several elements and update them simultaneously. You can also move, duplicate, group, and inspect multiple modules without working on each one separately.
In this tutorial, I'll show you how these features work using practical examples in the Divi 5 Visual Builder.
Watch the Divi 5 Multi-Select & Bulk Editing Video Tutorial
In the video, I demonstrate everything using a page with multiple service cards. You'll see how to select elements, update their styling, organize modules, apply presets, and make targeted changes using the Inspector.
Prefer written instructions? Follow the guide below.
Requirements: You'll need Divi 5 installed on your WordPress website. No additional plugins or downloadable layouts are required. Divi is a paid product from Elegant Themes.
How to Select Multiple Elements in Divi 5
Before you can edit multiple modules, you need to know how to select them.
Divi 5 offers several selection shortcuts, depending on whether you want to select individual elements, a range, or everything inside a particular container.
Select Individual Modules With Ctrl/Cmd + Click
The easiest way to select multiple elements is to hold Ctrl (Windows) or Cmd (Mac) while clicking the modules you want to include.
For example, imagine you have three service cards, each containing a Button module.
- Open your page in the Divi 5 Visual Builder.
- Hold Ctrl or Cmd.
- Click the Button module in the first service card.
- Continue holding the key and click the buttons in the other cards.
All three buttons are now selected.
Each selected module receives an outline, making it easy to see which elements are included.
You can also remove an individual module from your selection by holding Ctrl or Cmd and clicking it again.
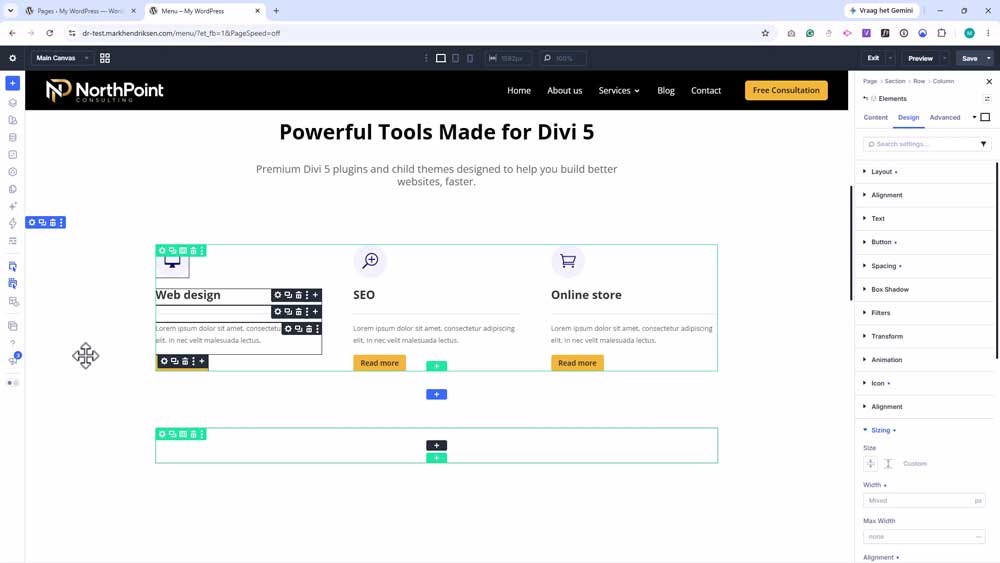
Select a Range With Shift + Click
If you want to select several elements located next to each other, use Shift + Click.
Click the first module, hold Shift, and click the last module in the range.
Divi selects the elements between them.
For example, if a column contains a Heading, Text, and Button module, you can select the Heading and Shift-click the Button to include all three.
Important: Range selection works only for elements sharing the same parent container. When you Shift-click an element in another container, Divi adds that element rather than selecting a range between the two.
Select All Elements Inside a Container
Another useful shortcut is Ctrl/Cmd + A.
Hover over a module and press Ctrl + A on Windows or Cmd + A on Mac.
Divi selects all elements sharing that module's parent container.
This is especially helpful when you have several modules inside a column and want to work with all of them.
To clear your selection, press Ctrl/Cmd + D.
How to Bulk Edit Multiple Modules in Divi 5
Now that we know how to select multiple elements, let's put bulk editing into practice.
Step 1: Select the Modules You Want to Edit
On my demonstration page, I have several service cards, each containing a heading, description, and button.
Let's say I want to change the design of three buttons.
Instead of opening their settings individually, I hold Ctrl and select all three.
Notice that the settings panel now displays Elements rather than the name of an individual module.
The panel still contains the familiar Content, Design, and Advanced tabs.
Step 2: Change Their Styling Together
With the buttons selected:
- Open the Design tab in the Elements settings panel.
- Find the Button styling controls.
- Change the button background color.
- Adjust the typography or spacing if needed.
The changes are applied to every selected button simultaneously.
For example, you could change all three buttons from blue to purple, increase their font size, and adjust their padding without opening another module.
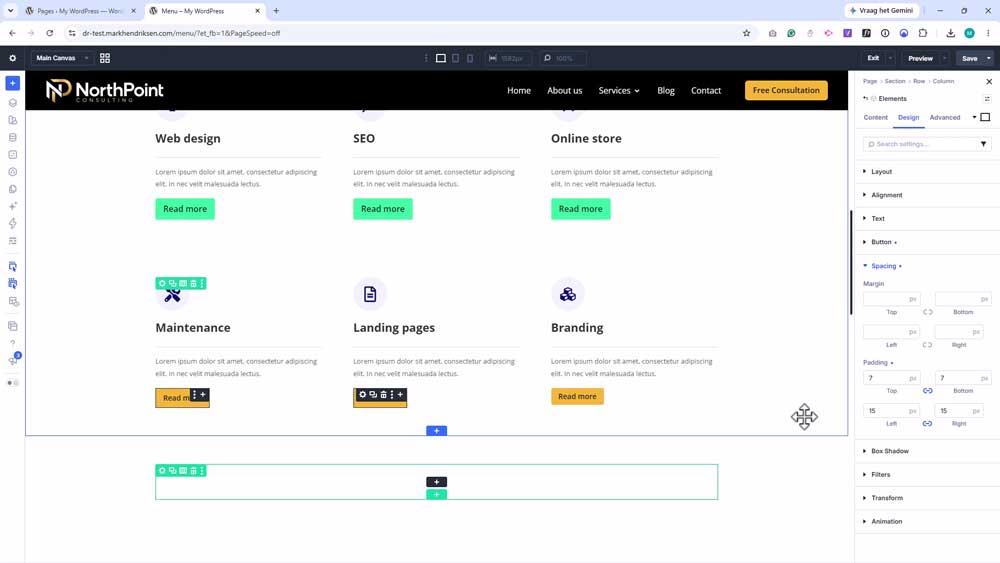
This becomes particularly useful when you're working with larger layouts containing many repeated elements.
Step 3: Understand Mixed Values
What happens if the selected modules have different values for the same setting?
Divi 5 handles this with Mixed values.
For example, imagine one button has 15px of top padding and another has 25px.
When you select both buttons and open their padding settings, the field displays Mixed instead of showing one of those values.
If you enter 20px, Divi applies that value to both buttons.
Mixed values can appear differently depending on the type of control. Number fields display a Mixed placeholder, while color controls can show a gray swatch.
This makes it easier to recognize differences before applying a shared setting.
Step 4: Edit Different Module Types Together
You don't have to select identical modules.
You can select a Text module and a Button module, for example, and edit their shared settings together.
Common option groups, such as Spacing and Border, can affect both modules.
Settings that are specific to a particular module type only affect the selected elements that support them.
This gives you more flexibility when designing pages containing different types of content.
How to Multi-Select Elements in the Layers Panel
Sometimes selecting modules directly on the page is difficult, particularly when working with nested or overlapping elements.
That's where the Layers panel becomes useful.
Open the Layers panel in the Divi 5 Visual Builder to see the structure of your page, including its sections, rows, columns, and modules.
The same selection techniques work here.
You can Ctrl/Cmd-click individual layers or Shift-click to select a range within the same parent.
The Layers panel and Visual Builder canvas share the same selection, so selecting modules in one view also highlights them in the other.
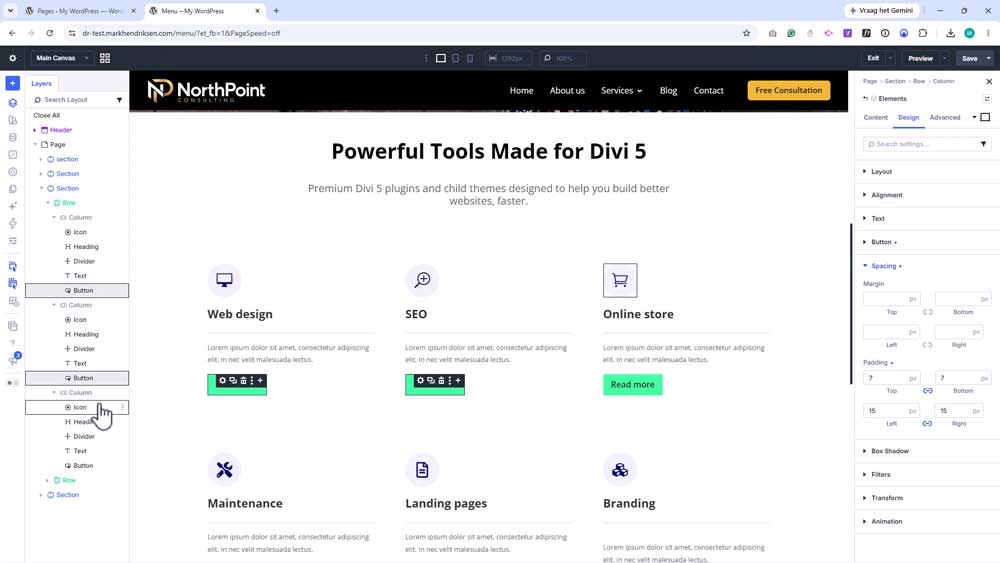
You can even drag multiple selected layers to another compatible position in your layout.
For complex pages, the Layers panel often provides a more convenient way to organize your content.
Move, Duplicate, and Group Multiple Modules
Bulk editing isn't limited to design settings.
You can also use multi-select to reorganize your page.
Move Several Modules Together
Imagine you have a Heading, Text, and Button module in one column and want to move them into another column.
Select all three modules, then drag the selection into the destination column.
Divi moves them together and keeps them selected after the move.
Duplicate Multiple Modules
Duplicating a collection of modules works similarly.
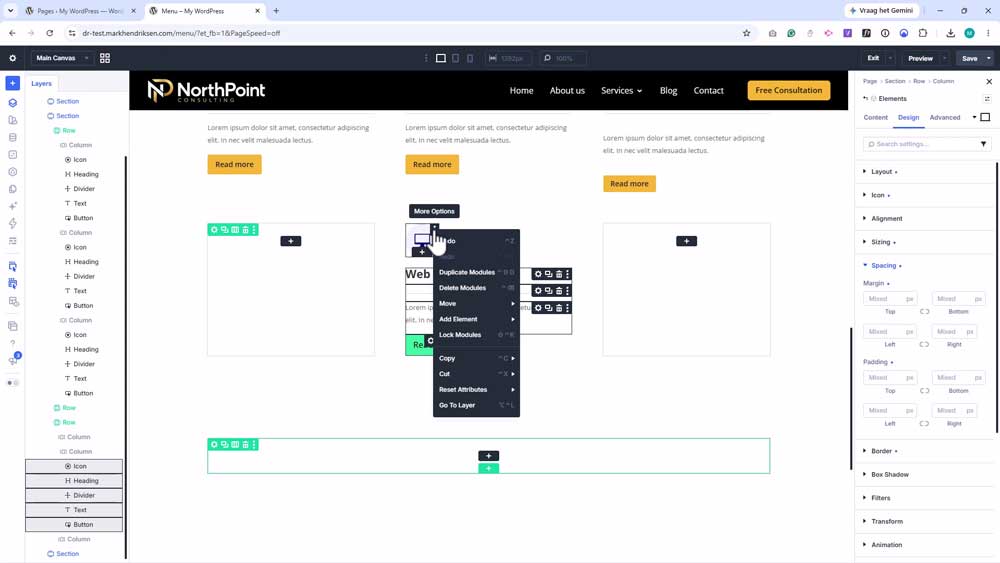
Select the modules you want to duplicate, right-click the selection, and choose Duplicate Modules.
You can also use the shortcut Ctrl/Cmd + Shift + D.
This duplicates the selected elements in a single action.
Create a Group Module
Another useful feature is the ability to turn multiple modules into a Group module.
Select two or more eligible modules and press Ctrl/Cmd + G.
Divi wraps the selected modules inside a new Group module.
This is useful for related elements that belong together, such as the heading, description, and button inside a service card.
There is one important difference:
- Multi-select creates a temporary selection so you can work with several elements.
- Grouping creates a container that remains part of your layout after you deselect the elements.
Grouping only works with supported module selections. It won't group a selection containing sections, rows, columns, existing Group modules, or child items.
Apply Element Presets to Multiple Modules
Divi 5's preset system works with bulk editing, making it easier to maintain consistent styling across your website.
For example, imagine you've created a Button Element Preset containing your preferred colors, typography, spacing, and borders.
Instead of applying it to every button individually:
- Select the Button modules you want to update.
- Open the Element Preset menu in the Elements settings panel.
- Choose your existing Button preset.
- Divi applies it to the compatible selected modules.
You can also work with Option Group Presets.
These are useful when different module types need to share a particular set of styles.
For example, you could apply a Border Option Group Preset to a Text module and an Image module at the same time.
Remember that existing local style overrides can affect how a preset appears. If a module doesn't look as expected, check whether it has locally applied styling.
Bulk Edit Responsive Settings and Hover Effects
Another useful aspect of Divi 5 bulk editing is that it supports responsive settings.
Let's say your buttons look good on desktop, but you want to adjust their padding on tablet screens.
Select the buttons, switch to the Tablet breakpoint, and open their Spacing settings.
When you change the tablet padding, Divi applies the new responsive values to the applicable selected buttons.
You can use the same approach with other supported responsive settings.
Bulk editing also works with hover states, allowing you to apply matching hover effects across several elements without configuring each one separately.
This is particularly helpful when building websites that need consistent styling across different devices.
Bulk Editing With the Divi 5 Inspector
The Divi 5 Inspector provides another way to make changes across multiple elements.
Instead of editing individual settings in the Elements panel, the Inspector gives you an overview of the styles, content, and presets used within your selection.
Here's a practical example.
Imagine you have six service cards sharing the same background color, but you only want to update two of them.
- Select the two card containers.
- Open the Inspector using the icon in the Visual Builder toolbar.
- Open the Styles area and find the background color used by the selected cards.
- Replace that color with your new choice.
Divi updates the matching values within the selected elements, including applicable nested content, while the other cards remain unchanged.
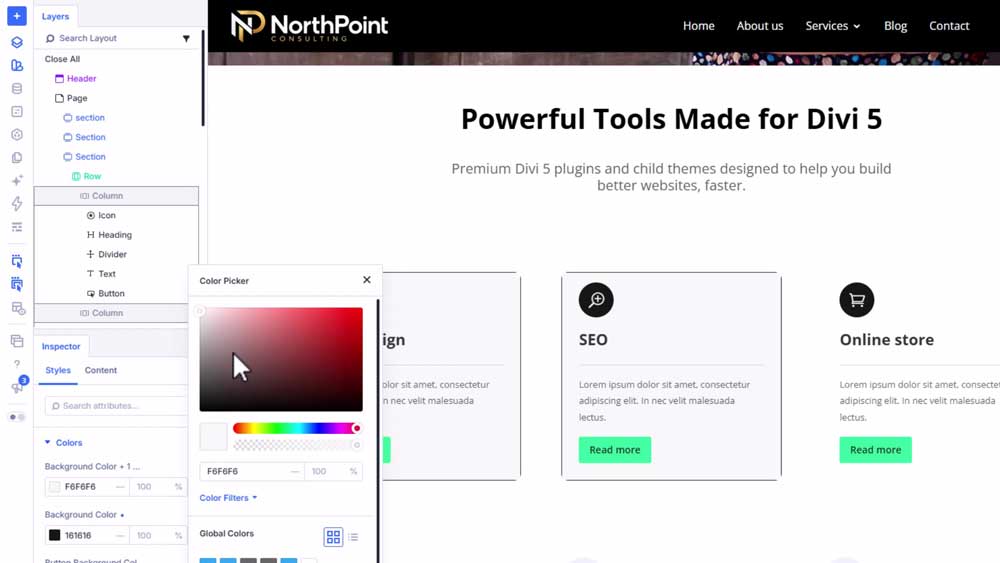
This makes the Inspector especially useful when you want to make targeted changes without affecting the rest of the page.
Keep in mind that editing shared presets or Design Variables is different from replacing a locally applied value. Changes to shared definitions may affect other elements that use them.
Divi 5 Multi-Select Keyboard Shortcuts
Here's a quick reference table containing the shortcuts covered in this tutorial.
| Action | Windows | Mac |
|---|---|---|
| Select individual elements | Ctrl + Click | Cmd + Click |
| Select a range | Shift + Click | Shift + Click |
| Select all elements in a container | Ctrl + A | Cmd + A |
| Deselect everything | Ctrl + D | Cmd + D |
| Duplicate selected elements | Ctrl + Shift + D | Cmd + Shift + D |
| Group selected modules | Ctrl + G | Cmd + G |
These shortcuts are worth remembering because they make everyday editing tasks much quicker.
Frequently Asked Questions
Yes. You can select different module types and update their compatible settings together. Shared settings, such as spacing and borders, apply to the elements that support them.
Yes. Ctrl/Cmd + Click allows you to select elements in different columns or other parts of your page. Shift-click range selection has parent-container restrictions.
Mixed indicates that your selected elements have different values for that setting. Entering a new value applies it to the applicable selected elements.
Grouping only works with eligible module selections. If your selection includes sections, rows, columns, an existing Group module, or unsupported child items, Divi won't create the group.
Locked elements are skipped by bulk editing actions. You also can't drag a selection containing a locked element.
Final Thoughts
Multi-Select and Bulk Editing are useful additions to the Divi 5 workflow.
Instead of opening every module and repeating the same changes, you can update several elements simultaneously, reorganize your layout, apply presets, and make targeted changes using the Inspector.
My recommendation is to start with Ctrl/Cmd + Click and get comfortable editing a few modules together. Once that becomes second nature, explore the Layers panel, grouping, presets, and Inspector.
And if you want to take your workflow further, check out my Divi 5 Components & Slots tutorial to learn how to create reusable layouts that stay connected across your website.
More Free Divi Resources
Looking for more resources to help you build websites with Divi?
You can join my Free Membership to access my collection of free Divi layouts and tutorial resources. Registration and email confirmation are required. You'll need your own Divi installation to use Divi layouts.
You can also explore my free Divi 5 Essentials Course for more step-by-step training. Free account registration is required for course access.
If you'd prefer to start with ready-made premium designs, my All Access Membership is a paid option that includes my collection of Divi child themes and layout packs.
For more practical Divi 5 tutorials, subscribe to my YouTube channel, TeachWebWithMark.
You can also find the full feature reference in Elegant Themes' official Multi-Select and Bulk Editing documentation.