


Divi 5 is still in alpha, but it already brings some exciting new features — especially the powerful interaction options. In this post, I’ll walk you through how to create an interactive service or project box using Divi 5, with smooth hover animations and a clean, modern design.
This is a showcase tutorial, meant to demonstrate what’s possible in Divi 5 Alpha. It’s not yet intended for production use.
What You’ll Learn
- How to download and import a pre-built layout
- How to customize images and content
- How the new Divi 5 interaction system works
- How to add hover effects using custom CSS
Step 1: Download the Layout
To get started, log in or sign up below.
Create a free account
Get Access to All of My Free Resources
Join the free membership and start downloading my layout packs
Join the Free Membership
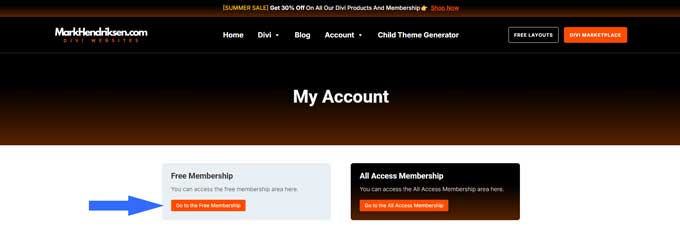
- Log in or create a free account
- Click on the “Free Membership” section
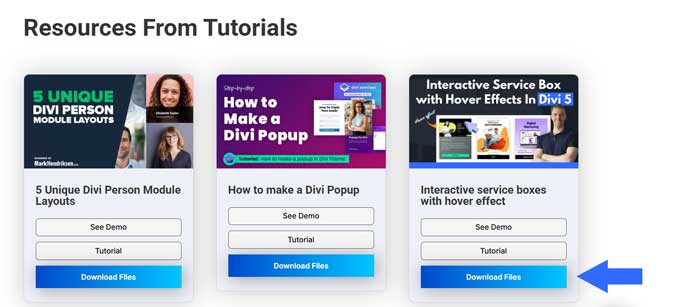
- Scroll down and download the Interactive Boxes layout
- Unzip the folder — inside you’ll find the
.jsonlayout file
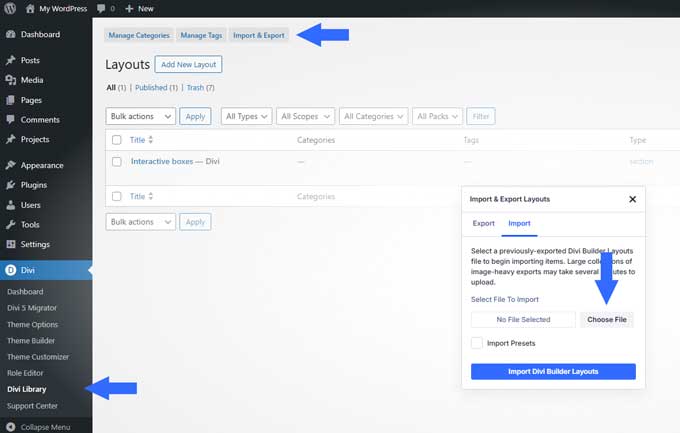
Step 2: Import the Layout into Divi Library
- Go to your WordPress Dashboard
- Navigate to Divi > Divi Library
- Click “Import & Export”
- Upload the downloaded
.jsonfile
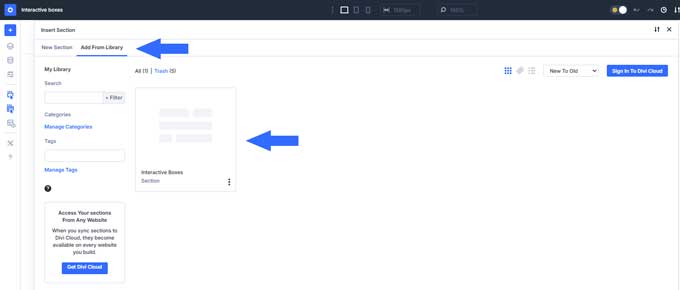
Step 3: Add the Layout to a Page
- Open the page where you’d like to use the interactive boxes
- Enable the Divi Builder
- Click the blue “+” to add a new section
- Go to the “Add From Library” tab
- Select the “Interactive Boxes” layout
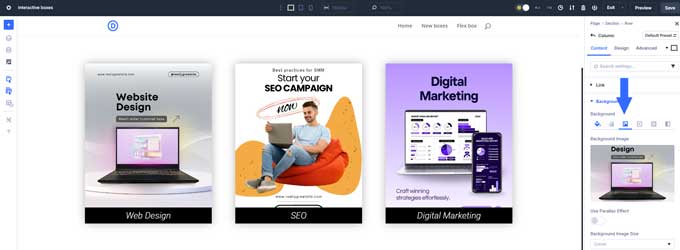
Step 4: Replace Images and Content
- Open the row, then a column
- Go to Background > Image tab
- Replace the placeholder with your own image (recommended size:
600x800px) - Repeat for each column
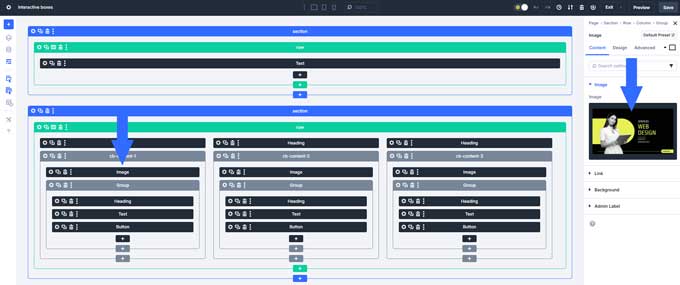
Edit Hover Content:
If you can’t click the hover content in the Visual Builder, switch to Wireframe View.
- Open the Image Module inside the hover group (recommended size:
500x281px) - Update the Heading, Text, and Button modules to your content
Step 5: Add Custom CSS
In Wireframe View, you’ll see a Code Module that contains the custom CSS.
You can either:
- Leave it there, or
- Move it to Divi > Theme Options > Custom CSS to keep your layout clean
To move it:
- Copy everything between the
<style>tags - Paste it into Divi > Theme Options > CSS
- Delete the original Code Module from the layout
Step 6: How the Hover Interaction Works in Divi 5
Divi 5 introduces new interaction options that let you add advanced behavior without third-party tools. Here’s how this effect works:
On Mouse Hover (In):
- Target: The group module with image, text, and button
- Action: Add attribute
- Attribute Name:
class - Attribute Value:
cb-show
This adds the cb-show class on hover, which triggers the CSS animation.
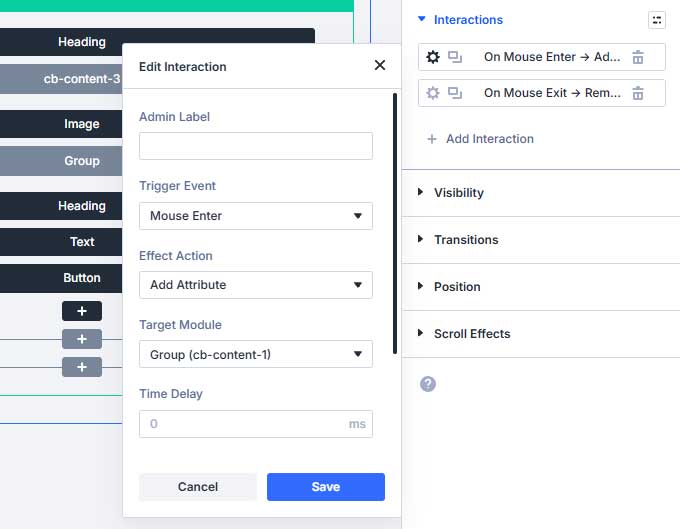
On Mouse Hover (Out):
- Same setup, but this time it removes the
cb-showclass
The CSS handles the slide-in and fade effect, while the interaction just toggles the visibility.
Final Thoughts
Even though Divi 5 is still in early development, the new interaction features open the door to building creative, interactive components with ease.
This tutorial shows just one possibility — imagine the animations, toggles, and dynamic sections you could create once Divi 5 is fully released.
