


Looking to add a smooth, scroll-triggered image transition to your Divi site? In this tutorial, I’ll show you how to create a sticky image scroll reveal effect in Divi 5 — perfect for storytelling, product features, or portfolio layouts.
Note: Divi 5 is currently in its alpha phase, so this tutorial is more of a preview of what’s possible rather than a production-ready workflow. That said — let’s dive in!
What We’re Building
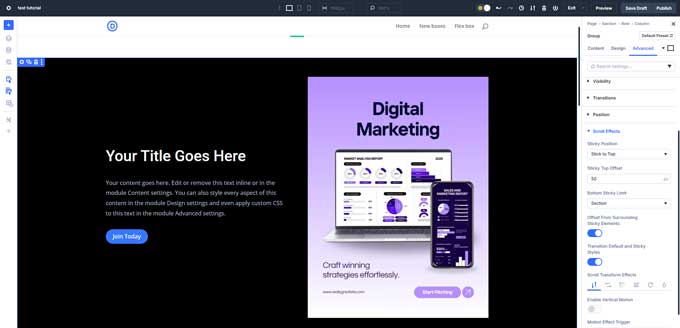
You’ll create a layout with text on the left and a sticky image on the right.
As the user scrolls down the page, the image stays in place, but at key points, it switches to a new image — like magic.
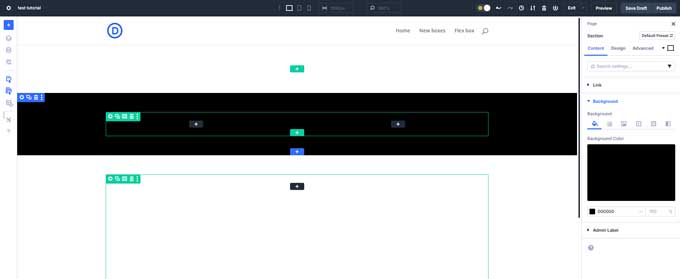
Step 1: Set Up the Layout
- Add a new section and choose a 50/50 two-column layout.
- Open the section settings and set the background color to black.
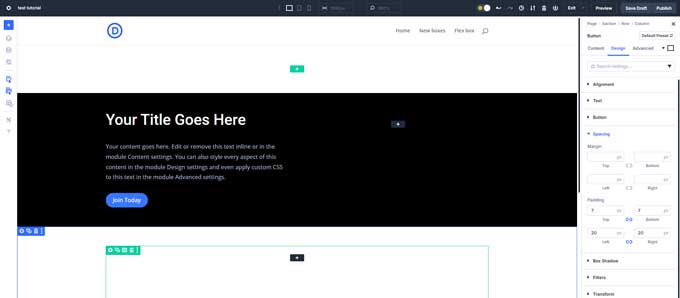
Step 2: Add Text to the Left Column
In the left column:
- Add a Heading Module.
- Set it to H2
- Change the text color to white
- Add a Text Module underneath.
- Font size: 16px
- Line height: 1.8
- Choose a readable color (white or light gray)
- Add a Button Module.
- Enable Use Button Styles
- Background: blue
- Text color: white
- Text size: 16px
- Border radius: 25px
- Border width: 0px
- Padding: 7px top & bottom, 20px left & right
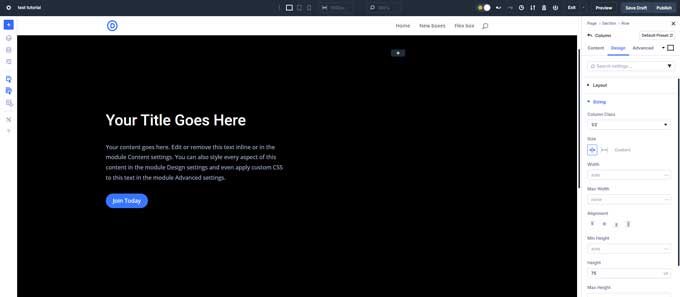
Step 3: Style the Row and Column
- Open the Row Settings and set the layout to Flex.
- Do the same in the left column: enable Flex and set Justify Content to Center — this vertically centers your content.
- Under Sizing, change the height unit to VH and set it to 75. This makes the column 75% of the screen height.
- Now duplicate this row twice, so you have three rows in total.
Step 4: Add the Sticky Image
In the right column of the first row:
- Add a Group Module.
- Under the Advanced tab > Scroll Effects, set:
- Sticky Position: Stick to Top
- Sticky Offset: 50px
- Bottom Sticky Limit: Section
- Inside the Group Module, add your first Image Module (e.g., 600x800px).
- Set a clear Admin Label like “Image 1”
- Duplicate the image twice to create Image 2 and Image 3.
- Switch to Wireframe View so you can easily select each stacked image
- Replace each image file
- Rename the Admin Labels to “Image 2” and “Image 3” for easy targeting
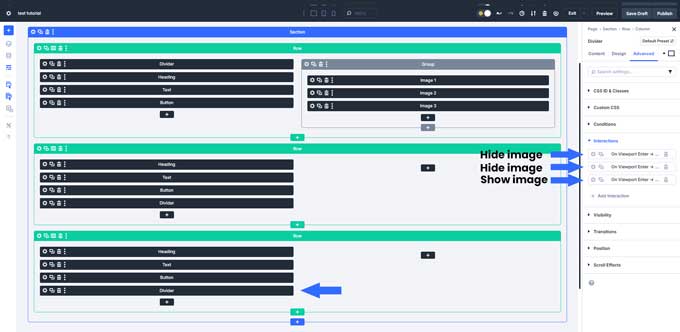
Step 5: Add Scroll Triggers to Show/Hide Images
We’ll now use Divider Modules to control when each image appears — based on scroll position.
First Row – Show Image 1
- In the first row, add a Divider Module at the top of the left column.
- Go to Visibility and disable Show Divider.
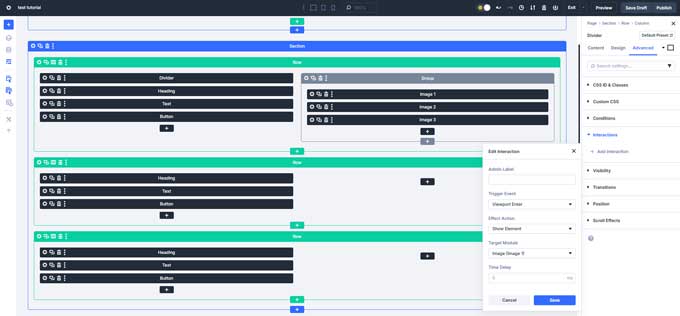
- In the Advanced tab > Interactions, add these settings:
- Trigger: Viewport Enter
- Action: Show Element
- Target: Image 1
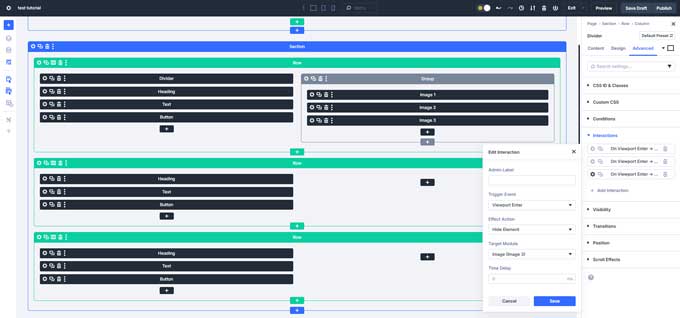
Then, add two more interactions to hide the other images:
- Viewport Enter → Hide Element → Target: Image 2
- Viewport Enter → Hide Element → Target: Image 3
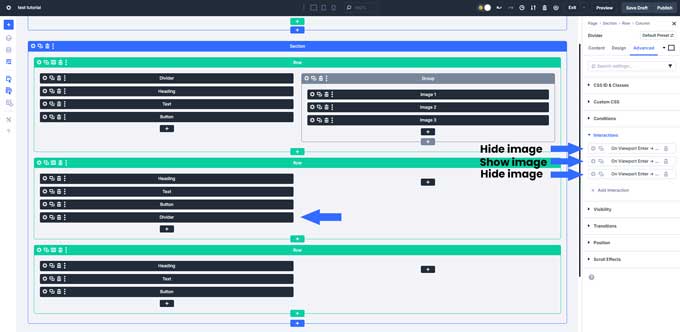
Second Row – Switch to Image 2
- In the second row, add a Divider Module just below the button.
- Hide it under Visibility.
- Under Interactions, add:
- Hide Element → Image 1
- Show Element → Image 2
- Hide Element → Image 3
Third Row – Switch to Image 3
- In the third row, add another Divider Module below the button.
- Hide it from view.
- Then add:
- Hide Element → Image 1
- Hide Element → Image 2
- Show Element → Image 3
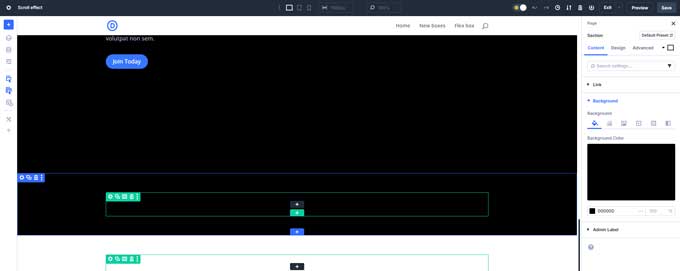
Step 6: Preview the Result
Now, save your layout and preview it on the front end.
As you scroll, the image on the right should stay sticky, with a 50px offset from the top, and change as each row comes into view.
Divi doesn’t currently support a bottom sticky offset — but here’s a workaround:
Add a new section below your layout, and set the background color to black to create a seamless scroll stop effect.
Step 7: Mobile Considerations
This effect works great on desktop, but not on mobile.
Here are two options:
- Hide the sticky image and dividers on mobile using visibility settings.
- Or create a mobile-friendly version of the section, and hide it on desktop.
You’re Done!
That’s it — you’ve just built a sticky scroll-reveal image layout in Divi 5!
It’s a stylish and engaging way to show visuals while keeping your layout interactive and clean.
Want more Divi 5 tutorials? Let me know what you’d like to learn next!
